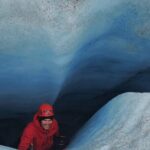
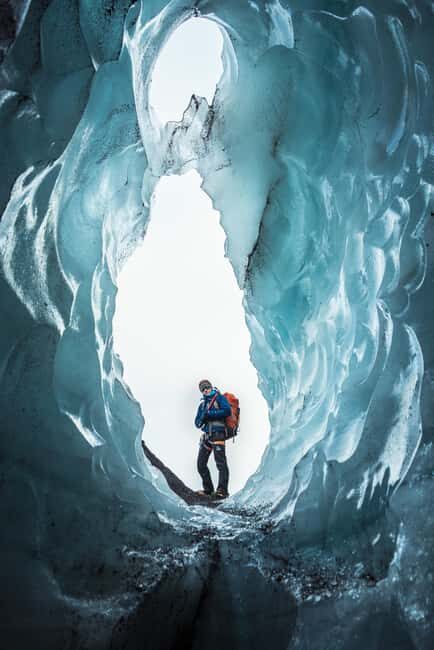
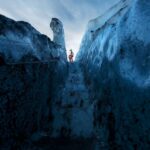
Blue crevasses make glacier hiking addictive.
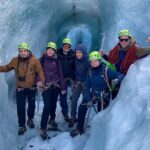
On Sólheimajökull Glacier, you can choose a short family walk or a longer trek, but you still get the same core payoff: stepping onto real ice and seeing how fast glaciers change. I like that this is a small-group hike with certified guidance, so the views feel earned instead of rushed.
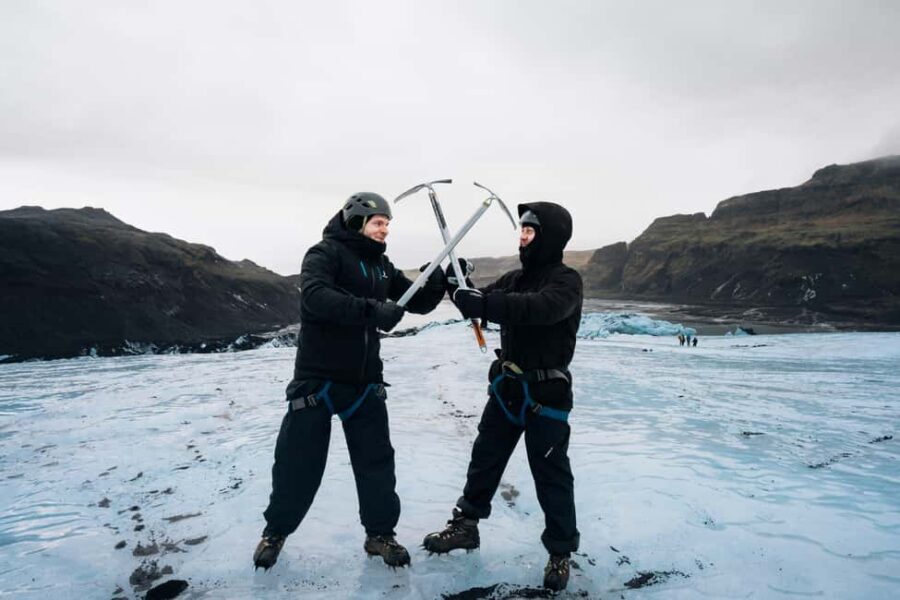
Two things I really like: first, the gear and safety setup, including crampons plus helmet and ice-axe instruction, which matters on uneven ice. Second, the way guides teach without making it boring; names that came up in recent groups include Ellie, Sam, Lasse, Jon, Denis Rosa, Stefen, Javier, and Sophia, and the common thread was clear instructions and confident control of the pace.
One possible drawback: it’s Iceland, so you’ll be cold and wet if you underpack. Plan on warm layers and rain gear, plus proper hiking boots (rentals are available on site).
In This Review
- Key things to know before you go
- Sólheimajökull Glacier: Why This Guided Hike Is Worth the Time
- Basecamp to Blue Ice: What Happens During Your 2.5 to 4 Hours
- Choosing the Right Option: Family Walk, Classic Hike, or Longer Trek
- Crampons, Helmets, Ice Axes, and Real Safety
- Weather, Clothing, and How to Prepare for an Ice Day
- Tea, Water, Restrooms, and What’s Not Included
- Time, Price, and Value From Vik (and Why It Feels Fair)
- Who This Glacier Hike Fits Best (and Who Might Hesitate)
- Should You Book This Sólheimajökull Guided Glacier Hike?
- FAQ
- How long is the Sólheimajökull guided glacier hike?
- How much does the tour cost?
- What’s included in the price?
- Do I need to bring my own food?
- What gear will I get for the glacier?
- What should I wear and bring?
- Is there a meeting point near Vik?
- Is the tour small group and in English?
- One more nudge before you go
Key things to know before you go
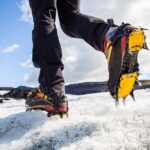
- Crampons, helmets, and ice axes are part of the experience (not an optional add-on), so you walk on ice with proper footing.
- English guides lead a small group (up to 12), which helps you stay together when the glacier gets tricky.
- You’ll see real glacier features like blue crevasses, ice ridges, and moulins (ice “wells”).
- Choose your distance: family-friendly walks, classic glacier hikes, or longer treks.
- A short drive from Vik keeps this hike practical even if you’re moving daily around South Iceland.
- Tea, coffee, and water are included, and there are restrooms at Sólheimajökull.
Sólheimajökull Glacier: Why This Guided Hike Is Worth the Time
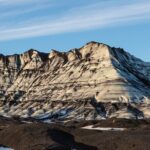
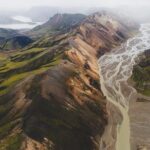
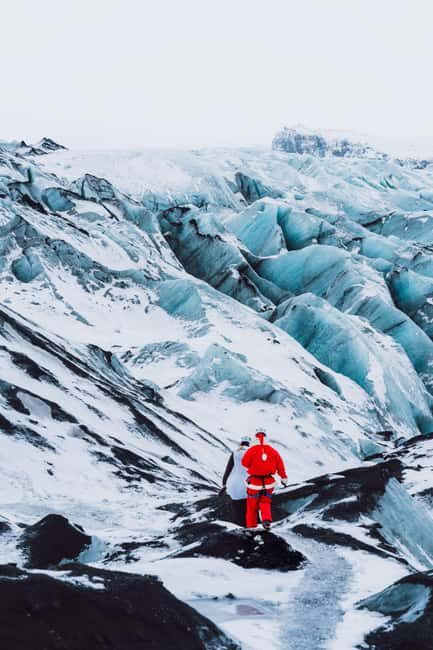
Sólheimajökull is one of those Iceland places where “close-up” is the whole point. From the edge, the ice looks dramatic in pictures. On the ground, it’s more than dramatic—it’s active. The glacier is moving and melting, and you can literally see the results in the cracks, ridges, and deep shafts where meltwater drops down.
This hike is interesting because it mixes two things you usually have to trade off in Iceland: access and context. You get access to the ice—actually walking on it with the right equipment—and you get context from a guide who explains what you’re seeing and how glaciers respond to climate change. That turns the day from scenery into understanding.
And I like the way this experience is built for different comfort levels. The operator offers options that range from a family walk to a longer trek, so you’re not stuck doing a one-size-fits-all route. If you’re new to glaciers, that matters. If you’re returning to Iceland, it still feels purposeful because you choose how far onto the ice you want to go.
You can also read our reviews of more guided tours in Vik
Basecamp to Blue Ice: What Happens During Your 2.5 to 4 Hours
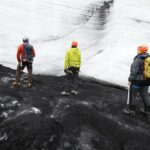
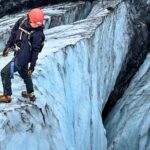
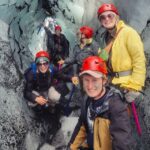
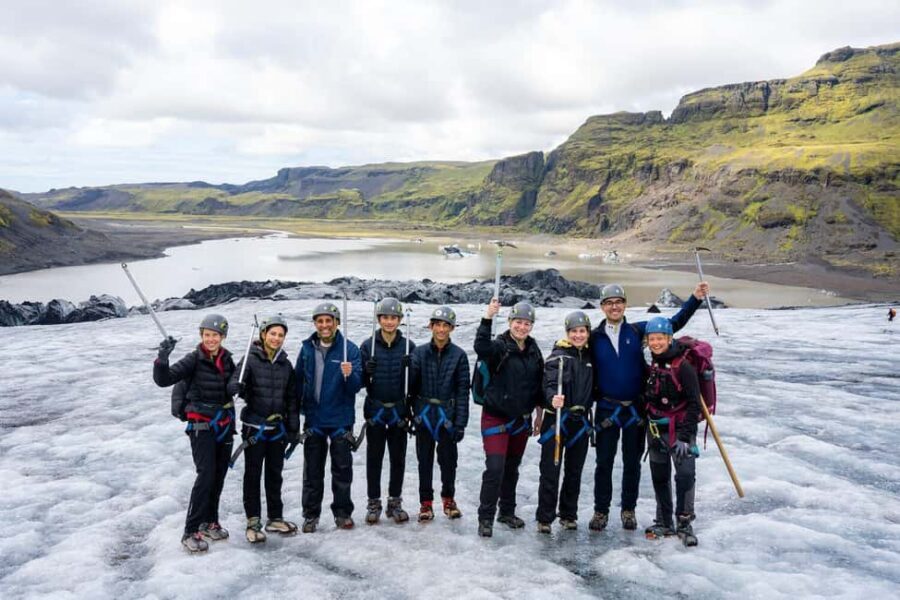
The day starts at the basecamp by Sólheimajökull Glacier. You meet your certified guide and get kitted up with safety gear—crampons, a helmet, and an ice axe—before you step off safe ground. Even if you’ve hiked before, this part is worth paying attention to. Good guidance here helps you feel steady when the ice changes texture under your feet.
From there, you take a short walk to the glacier edge. This “approach” walk is usually when you get the quick briefing: how to move as a group, what signals to follow, and how to use the tools you’ve been handed. It’s not complicated, but it is firm. The goal is simple: keep you safe, keep you together, and keep you able to enjoy what’s ahead.
Then you go onto the ice.
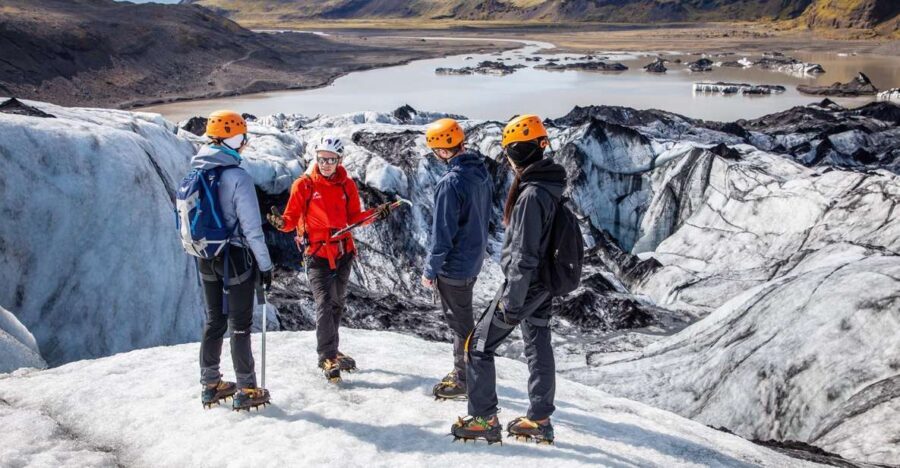
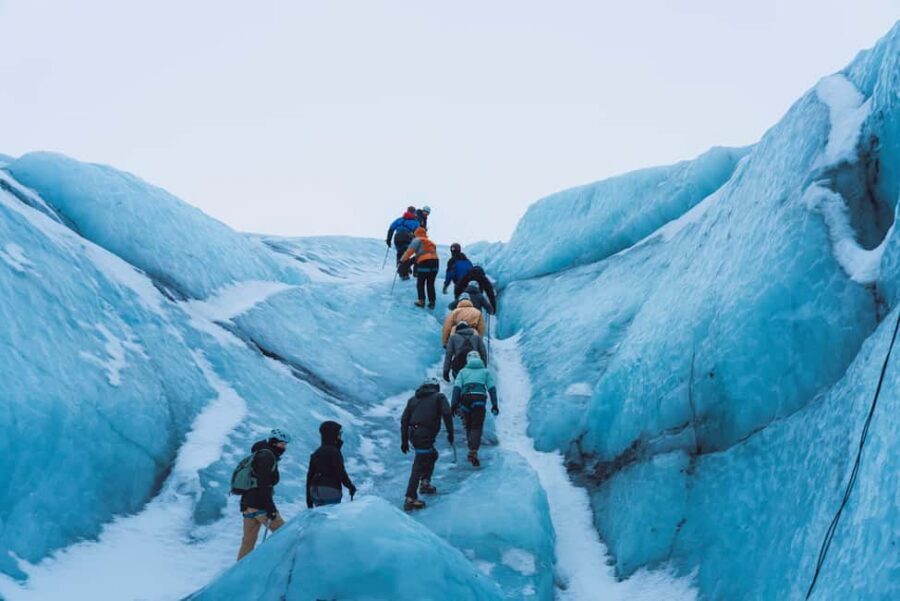
On the glacier, you’ll spend most of your time walking through a frozen world with bright blue crevasses, towering ice ridges, and moulins—natural openings that form as meltwater runs and the ice shifts. What makes this section special is how different the glacier looks depending on where you stand. Up close, a crack doesn’t feel like a crack. It feels like depth. And on a clear day, the blue tones can look almost unreal.
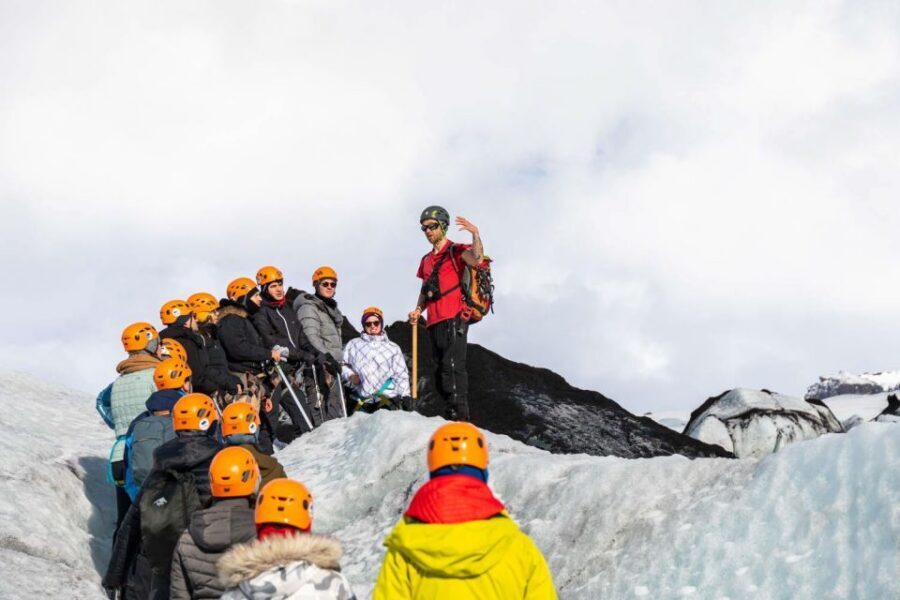
Your guide also points out glacier features and gives the science behind them. You’ll hear how glaciers shape land over thousands of years, and how they’re affected by today’s climate. That adds weight to the visuals. You’re not just walking across ice—you’re walking through a slow-moving system that’s been reshaping the planet long before you arrived.
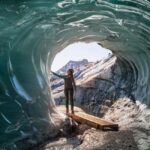
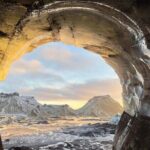
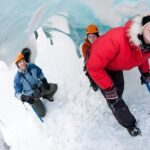
Depending on the option you book, you might go further into the ice and see more of these formations. Some groups highlight a standout moment like an ice glacial tunnel, and others mention the thrill of looking down into an ice hole/well area created by meltwater. The exact route and features you see can vary, but the feeling is consistent: you’re close enough to understand why glaciers inspire both awe and concern.
Choosing the Right Option: Family Walk, Classic Hike, or Longer Trek
One of the smartest things about this tour is that it gives you a real choice. The experience is offered in different lengths and intensities, so you can match the glacier to your day.
- Family-friendly walk: Best if you want the core glacier experience without the longer time on ice. You’ll still get gear, guidance, and those signature glacier features, just with a more relaxed pace.
- Classic glacier hike: Ideal if you want a balanced time on the ice and enough depth in the experience to feel like you truly explored, not just touched the surface.
- Longer, more adventurous trek: Pick this when you’re comfortable spending more time on the glacier and want a deeper look at the ice formations.
What I like about this setup is that it avoids the common trap: choosing a “beginner” hike that’s still too intense for your group, or choosing a “challenge” hike when you actually want a learning-focused walk. Here, you can scale the time on ice without losing the guided teaching component.
One small planning note: you won’t be able to fully control conditions. If wind or rain picks up, your guide may adjust how you move for safety. That’s normal in glacier terrain, and it’s another reason the guide matters more than the route description.
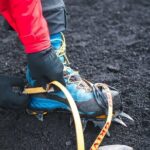
Crampons, Helmets, Ice Axes, and Real Safety
This is the part that makes the difference between seeing glacier ice and actually walking safely on it.
You’ll be given glacier gear—crampons and an ice axe, along with a helmet—and your guide will walk you through how to use it. That instruction is what turns “I hope I don’t slip” into “I know what to do if the ice gets uneven.” Recent guides celebrated for strong leadership include Ellie and Sam, with multiple groups praising clear equipment instructions and a calm, safety-first approach. Others—Lasse, Jon, Javier, and Stefen—were highlighted for confidence, humor, and consistent control of the group.
Also, this is a small group set up with a cap of 12 participants. That’s not just a comfort perk. On ice, smaller groups mean faster check-ins, clearer spacing, and fewer people trying to negotiate the same footing at once.
If you’re the kind of person who hates feeling rushed, you’ll probably appreciate how guided instruction shapes the pace. If you’re traveling solo, this is also a good format because you get a social group without it turning into a giant crowd.
Weather, Clothing, and How to Prepare for an Ice Day
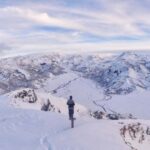
Even though the tour runs year-round (and reviews include summer through winter), glacier hikes are cold and exposed. Your best move is dressing like you expect wind and wet conditions, not like you expect a mild walk.
Based on what you’re told to bring, plan on:
- Warm clothing
- Hiking shoes
- Rain gear
And don’t stress if you forgot something important. Rain gear and hiking boots can be rented on site. That helps a lot if you’re rolling through South Iceland with limited packing space.
A practical tip: wear layers you can adjust. If you’re too bundled at the start, you’ll sweat on the approach walk and feel miserable the moment you stop to listen. If you’re underdressed, you’ll feel it in your hands and feet once you’re standing on the ice.
For photos: you’ll likely stop often to look at crevasses and moulins. That’s the moment to slow down, steady your stance, and take your shots carefully. On the ice, footing first. Cameras second.
You can also read our reviews of more hiking tours in Vik

Tea, Water, Restrooms, and What’s Not Included
This tour is thoughtfully built for comfort on a short Iceland outing.
Included:
- Tea, coffee, and water
- Glacier gear and safety equipment
- A certified guide
- Restroom access at Sólheimajökull
Not included:
- Food
Because food isn’t included, plan ahead if you’re doing this as part of a longer day. Eat before you arrive at the basecamp, then use the included drinks to stay warm and hydrated during the hike.
Also, the restroom access at Sólheimajökull is a real convenience. For a glacier walk that lasts up to 4 hours, it helps you avoid feeling rushed at the worst possible time.
Time, Price, and Value From Vik (and Why It Feels Fair)
The tour runs 2.5 to 4 hours, and the price is $115 per person. That might sound like a lot until you break down what you’re paying for: not just a guide, but the gear and the safety setup that lets you walk on active glacier ice.
Here’s the value math that matters in Iceland:
- You’re getting trained instruction on ice movement and safety.
- You’re getting crampons, helmets, and ice axes.
- You’re not paying separately for the gear experience.
- You’re getting included drinks, plus restroom access.
You also get a tight timeframe. The meeting point is about a 25-minute drive from Vik, so you can fit this into a South Iceland itinerary without turning it into a whole day of transportation.
One more thing: the group size cap at 12 helps keep the experience feeling personal. That’s part of the value, even if it’s hard to quantify.
If you’re flexible, you might like the added ability to reserve now and pay later, and the tour offers free cancellation up to 24 hours in advance. That makes planning easier when Iceland weather is doing Iceland weather things.
Who This Glacier Hike Fits Best (and Who Might Hesitate)
This hike is a strong fit if:
- You want to walk on an actual glacier, not just see it from a viewpoint
- You prefer guided safety and instruction
- You’re okay dressing for cold, wet conditions
- You want your glacier time to include explanation of how glaciers work and why they’re changing
It might be less ideal if:
- You hate hiking in crampons or you feel uneasy on uneven surfaces (the guide helps, but you still need to be willing to follow instructions and move carefully)
- You’re not prepared for rain and cold despite being offered rentals (the rental option helps, but it doesn’t remove the need to dress right)
The nice part is that the experience includes options—from gentler walks to longer treks—so you can choose a version that matches your comfort level.
Should You Book This Sólheimajökull Guided Glacier Hike?
Yes, if your goal is to experience Sólheimajökull in a way that feels close, guided, and educational.
Book it if you want real glacier walking with the right gear and a guide who keeps the group safe and informed. The best sign is consistency in what people praised: strong leadership on the ice, clear instructions, and a fun yet controlled vibe. If you’re picking the right option for your fitness level, you’ll likely feel like the price is fair because you’re not just buying access—you’re buying safety, gear, and real interpretation.
Skip it only if you’re not willing to dress for cold and rain or you don’t feel comfortable following step-by-step instructions on uneven ice.
FAQ
How long is the Sólheimajökull guided glacier hike?
The duration is 2.5 to 4 hours, depending on the option you book. You can check starting times based on availability.
How much does the tour cost?
The price is $115 per person.
What’s included in the price?
Included items are the experienced qualified guide, glacier gear and safety equipment, tea/coffee/water, and access to restrooms at Sólheimajökull.
Do I need to bring my own food?
Food is not included.
What gear will I get for the glacier?
You’ll be provided glacier hiking gear and safety equipment, including crampons, a helmet, and an ice axe.
What should I wear and bring?
Bring warm clothing, hiking shoes, and rain gear.
Is there a meeting point near Vik?
Yes. The meeting point is a 25-minute drive from Vik.
Is the tour small group and in English?
Yes. It’s limited to 12 participants and the live tour guide is English.
One more nudge before you go
If you book, choose the option that matches your comfort level on ice. Then show up ready for wet cold. Do that, and you’ll get the kind of glacier time that sticks in your head long after the drive back from Vik.