Glacier kayaking feels like a secret.
This calm, guided trip on the Sólheimajökull Glacier Lagoon gives you a rare view of the ice from the water, with towering blue-white walls and drifting pieces close enough to feel unreal. I especially like that they provide the full dry suit setup plus instruction, so first-timers can focus on enjoying the moment. One possible drawback: the short walk to the water over rocky lava can be sore on your feet, especially in thin rubber booties.
The best part for me is how the tour is built for real beginners.
You meet at the Sólheimajökull parking lot, get geared up in a dry suit, and learn basic paddling before you head out in stable sit-on-top kayaks—so you’re not wrestling your kayak while trying to take in glacier views. The group stays small (up to 8 people), and guides like Daniella and Sebastian come through in the way they pace the tour, teach safety clearly, and keep things smooth.
This is a stress-free way to see a glacier up close.
Most people can participate without prior kayaking, and the timing (about 2 hours 30 minutes) gives you real time on the lagoon without turning it into an all-day grind. Just remember: you’ll want warm layers, because you’re on cold water and wind can add a chill even with the suit.
In This Review
- Key points before you go
- Why Sólheimajökull Glacier Lagoon kayaking beats “just hiking”
- Meeting at the Sólheimajökull parking lot and getting geared up
- Dry suit comfort: what you get, and what you still need
- Paddling basics in stable kayaks (no prior experience needed)
- On the water: icebergs, glacier views, and keeping it calm
- The Solheimajökull stop: what you actually see from the kayak
- Time on the water: 2 hours 30 minutes that feels well-paced
- Guide style: from Daniella to Sebastian to Fernanda
- Value for $170: what you’re paying for beyond the kayak
- What to bring (and what to consider if your feet or hands get cold)
- Who this tour suits best (and who might want a different plan)
- Should you book glacier kayaking at Sólheimajökull?
- FAQ
- What’s included in the kayaking tour?
- Do I need prior kayaking experience?
- How long does the tour last?
- Where do I meet the guide?
- What should I bring?
- What happens if weather is bad?
Key points before you go
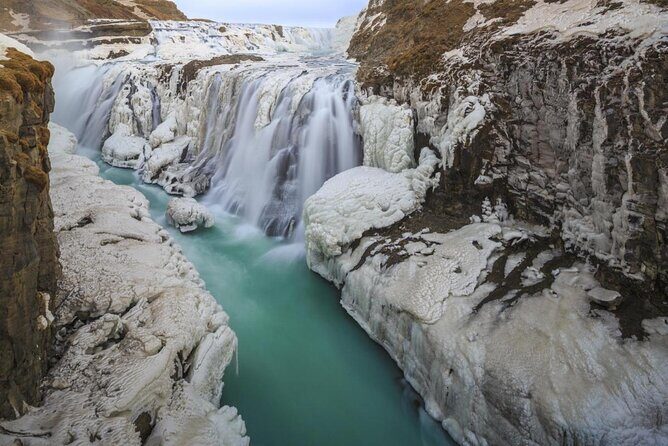
- Beginner-friendly sit-on-top kayaks help you paddle confidently right away
- Dry suit + gloves/booties/paddle included, so you don’t have to chase gear
- Small groups (up to 8 people) make instruction and photo stops easier
- Icebergs close to the glacier create a quiet, surreal “how is this real?” feeling
- Bring warm clothes and extra socks since what’s provided may not be enough for everyone
Why Sólheimajökull Glacier Lagoon kayaking beats “just hiking”
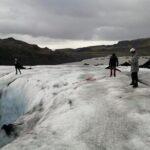
Watching Sólheimajökull from land is impressive. Watching it from a kayak is a different kind of wow—because the ice isn’t a wall anymore. It becomes a moving world: fragments drift, shadows shift, and you get that rare sense of scale when the glacier looms over the lagoon from sea-level-ish perspective.
What makes this tour work for a lot of people is that it’s paced like a guided nature walk that happens to float. You don’t spend the whole trip thinking about technique. You learn the basics on calm water first, then follow your guide through the lagoon at a comfortable rhythm.
I also like the emphasis on glacial history and geology. It’s not just scenery talk. Guides explain what you’re looking at, including why the ice looks the way it does—blue ice versus darker areas—and how the ice and icebergs fit into the bigger story of glacier activity and climate change.
You can also read our reviews of more tours and experiences in Vik
Meeting at the Sólheimajökull parking lot and getting geared up
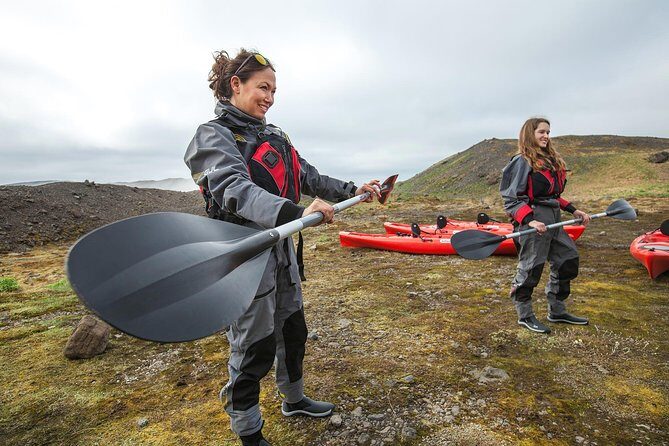
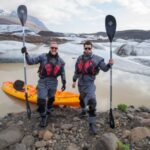
Your meeting point is the Sólheimajökull glacier parking lot (221, 871, Iceland), and you should arrive about 30 minutes before departure. That buffer matters because you need time to check in, get fitted, and learn the safety basics without rushing.
Expect a straightforward setup: you gear up in the dry suit, get outfitted with the technical equipment, and do a quick instruction session on land before you’re on the water. Reviews often point out how smoothly this stage runs, especially when guides like Carla Paz help people get dressed with patience and care.
There’s one practical thing to plan for: getting to the water involves a short walk over natural volcanic surfaces. One review described it as about a quarter mile and noted sharp, jagged pebbles with no real path—so bring the mindset that your feet might feel it.
Dry suit comfort: what you get, and what you still need
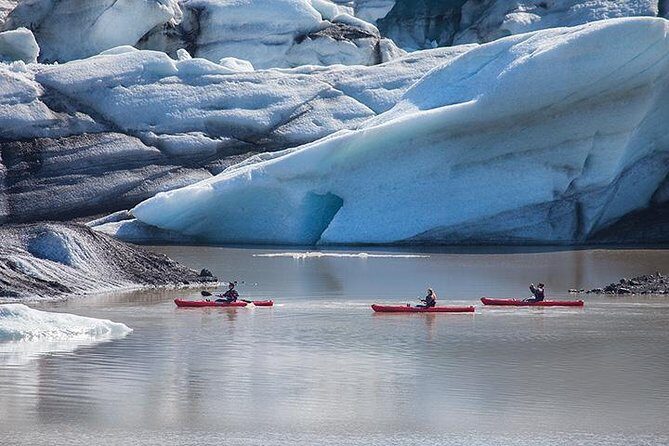
The tour includes a dry suit, plus kayak and paddle. That’s a big deal because it lowers the barrier for first-timers and helps you stay warm and dry enough to enjoy the full session instead of shivering through it.
Still, the tour notes that warm clothing is not included. That’s your cue to layer. Even with a dry suit, you want insulating layers underneath that can handle wind chill and time on cold water. Also bring an extra pair of socks—because wet socks (even from sweat) can make you miserable fast.
A couple of fine-print realities from reviews:
- Some people mention provided gloves not performing as expected (holes/soaking).
- Others mention that in warmer months, the suit fit can cut wind enough that you may not need as heavy of a jacket as you’d think—but you still should dress for cold conditions.
My advice: if you run cold, add a little extra insulation. If your hands get cold easily, consider bringing your own glove liners or backup gloves if you have them.
Paddling basics in stable kayaks (no prior experience needed)
You’ll start with instruction on basic paddling techniques before heading out in the lagoon. The kayaks are sit-on-top and designed to be stable, which is what you want when you’re learning and trying to keep your body relaxed.
You’ll likely spend the first moments getting your bearings—holding the paddle correctly, learning how to steer, and practicing simple movements. From reviews, the guides’ safety briefings tend to be clear, and many people highlight how patient instruction made a difference, especially when someone needed extra time gearing up.
On the water, the pacing matters. A few reviews note the guides are hands-on when it comes to safety, but also allow quiet paddling once you’re comfortable—so you can look up at the ice instead of constantly “performing” for the group.
And yes, you should expect some effort. One review noted paddling against a stream can feel like a mini-workout. That’s normal. Think of it as gentle cardio while you watch icebergs drift by.
On the water: icebergs, glacier views, and keeping it calm
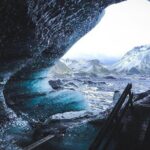
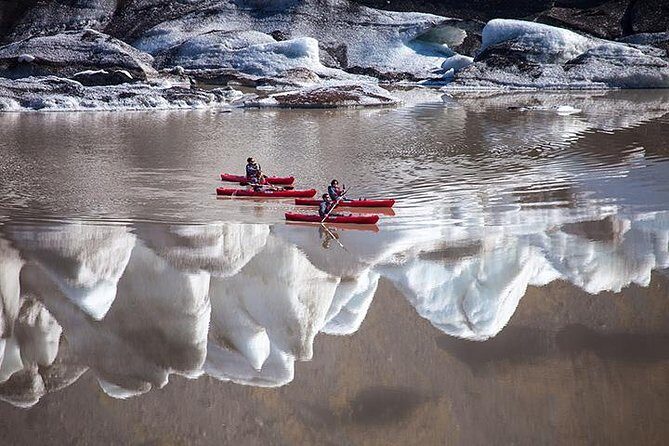
The lagoon experience is the heart of the tour. You glide across calm, iceberg-dotted water with towering blue and white ice formations around you. The goal is to get you close to the glacier and drifting icebergs while staying in safe areas guided by your instructor.
This is where the small group size really helps. With up to 8 people, it’s easier for the guide to manage spacing, spot where everyone should paddle, and pause for photos without turning the trip into a crowded shuffle.
Most guides also build in moments that feel like a timeout from the rest of Iceland travel. Reviews describe it as peaceful and away from crowds—exactly because you’re on the water, moving slowly, and letting the glacier and ice do the talking.
A couple of real-world notes to hold in your brain:
- Wind can kick up and make paddling feel more “real.”
- Some groups report being able to kayak around icebergs at a comfortable distance, while safety rules limit how close you can get.
- Guides often stop at photo moments, but you still spend most of your time floating and looking.


The Solheimajökull stop: what you actually see from the kayak
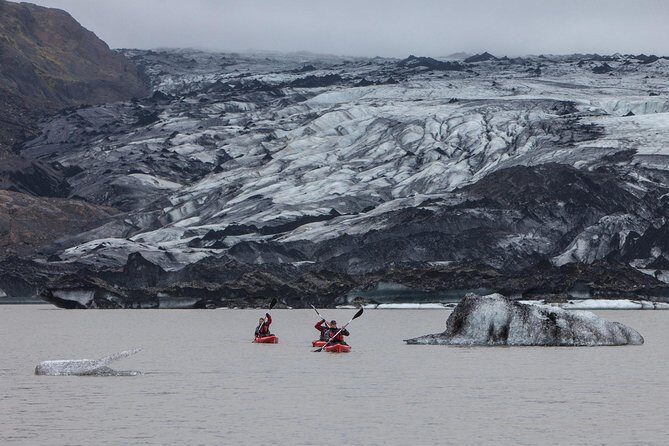
The glacier portion centers on Sólheimajökull itself. From the water, you get views that feel more immediate than land-based spotting: the glacier’s edge can look massive, while nearby icebergs break up into shapes you can almost study.
This is also where the guides’ teaching earns its keep. Several reviews mention guides explaining the glacier and the environment—covering both what you’re looking at now and what’s happening to glaciers over time. One review even tied the area to volcanic ash explanations, which hints that guides connect this glacier scenery to the wider geology of Iceland.
Also, don’t be surprised if you hear talk about why ice looks blue. Blue ice is one of those things that’s easy to accept on faith until someone explains it in plain terms, and then it clicks immediately.
And one fun detail: a review mentioned tasting ice from smaller icebergs. That’s not something you should count on everywhere, but it shows the guides sometimes add small, memorable moments when conditions allow.
Time on the water: 2 hours 30 minutes that feels well-paced
The tour runs about 2 hours 30 minutes total. That length is a sweet spot for this kind of activity: long enough to learn, gear up, paddle around, and still feel like you had a real glacier moment without the tour eating your whole day.
Here’s the flow you can expect:
- Gear up and get briefed first
- Paddle basics on calm water
- Follow your guide through the lagoon with stops for ice views and photos
- Return to shore and end back at the meeting point
If it’s windy, the tour can feel a bit more physical, but guides typically keep it manageable. If it’s calm, it can feel almost meditative—slow strokes, ice around you, and the glacier dominating the horizon.
One review even described having the tour nearly to themselves (only two people), which suggests some departures can feel extra personal. Either way, the structure keeps you from feeling lost or rushed.
Guide style: from Daniella to Sebastian to Fernanda
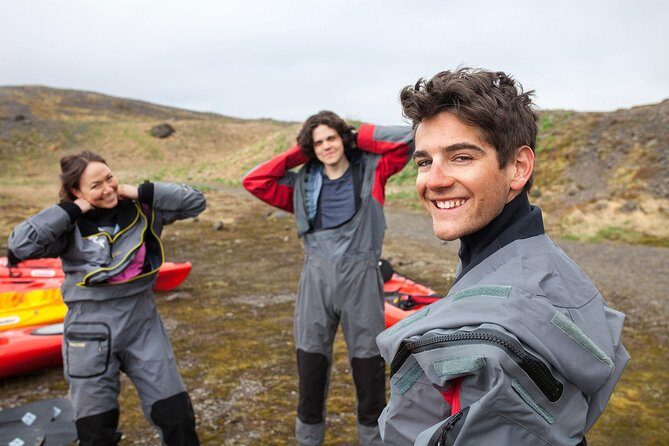
In a glacier kayaking tour, the guide is half the experience. You need clear safety guidance, smart route choices, and a pace that lets you look up without feeling unsafe.
The names that come up repeatedly show the range of personality you might meet:
- Daniella is praised for smooth logistics, glacier knowledge, and balancing activity with time to simply enjoy the views.
- Sebastian shows up as friendly and funny, with glacier history and a focus on helping people paddle safely while taking great pictures.
- Fernanda is praised for safety briefing, sharing facts about glacier and icebergs (including why ice appears blue), and taking extra time to teach while keeping the trip fun.
Carla Paz also gets credit for an easygoing approach that still feels informative and safe. And in one case, Thomas is praised for being especially patient while supporting a son with autism—an important reminder that good guides adjust to real people, not just checklists.
One caution from the less-perfect review: one guide was described as strict and repeatedly scolding people for small attempts to help. That’s not how most guides are described, but it’s a reminder to follow instructions, keep gear handling simple, and let the guide lead. If safety rules are stated, take them seriously.
Value for $170: what you’re paying for beyond the kayak
At $170 per person, this isn’t a cheap outing. The question is what you’re buying—and here, you’re paying for reducing friction.
You’re getting:
- Professional guiding
- Technical equipment
- Kayak and paddle
- A dry suit
That package is the real value. You’re not trying to source cold-water gear on the road, figure out how to dress for glacier conditions, or guess whether you’re doing the paddling correctly. The instruction plus safety briefing can be worth more than the rental gear alone.
The price also buys time with the glacier in a way that’s hard to replicate on your own. Getting to the right water area, finding safe routes, and managing proximity to icebergs is exactly what trained guides handle.
One review called the price expensive but worth it because the experience was a highlight, including the surprise of being able to taste ice from smaller icebergs. Another review noted free coffee (and a food van that costs extra), which isn’t part of the core pricing—but it does reflect that the team thinks about comfort and morale.
So the value case is this: if you want a guided, gear-provided glacier kayaking experience in Vik, this price is trying to deliver safety, comfort, and a smooth learning curve.
What to bring (and what to consider if your feet or hands get cold)
Even though gear is provided, your comfort depends on what you wear under and around it. Do two things well: dress for cold and protect sore spots.
Bring:
- Warm clothing (not included)
- An extra pair of socks
- Layers you can move in while sitting and paddling
- Something you can tolerate during the short walk to the water
Consider also:
- Foot comfort for rocky surfaces. That volcanic walk over pebbles is the part that can hurt in booties, so plan for it.
- Hand warmth. Since at least one review mentioned gloves with holes and soaking, it’s smart to double-check what you’ll wear on your hands. If you’re prone to cold hands, bring backup liners or your own gloves if allowed.
And if you’re traveling in windy conditions, pack accordingly. Wind chill can make even a dry suit outing feel colder, so layers matter.
Who this tour suits best (and who might want a different plan)
This tour is built for first-timers. If you’ve never kayaked, the stable sit-on-top design, instruction, and guided route are exactly the right setup.
It also works well if you want an active experience without signing up for something extreme. It’s not “stay on land and look.” You’re on the water, you paddle, and you get close to icebergs—but the guides keep you in safe, manageable zones.
If you have trouble with rocky walking, think twice. The short hike to the water over lava rock can be painful for some people in thin rubber booties. You might still enjoy the experience, but go in with eyes open and consider footwear tolerance.
If you hate rules and need total independence, this may feel a bit controlled. The experience is guided for safety, and some people want more freedom to wander. On the positive side, most people describe a good balance of instruction and quiet paddling time.
Finally, if you’re sensitive to cold, dress extra warmly. The suit helps, but your layers matter.
Should you book glacier kayaking at Sólheimajökull?
If your goal is a once-per-trip glacier experience that feels close-up and memorable, I think this is an easy yes. The combination of beginner-friendly kayaks, included dry suit gear, and expert instruction makes it one of the more straightforward ways to see Sólheimajökull from the water.
Book it if:
- You want the glacier and icebergs from the lagoon, not from a viewpoint
- You like guided instruction that gets you comfortable fast
- You can handle a short rocky walk and a bit of paddling effort
Skip it or look at alternatives if:
- Walking over volcanic rock sounds like a deal-breaker for your comfort
- You expect maximum freedom and minimal guide control
- You’re arriving without warm layers
One last real-world factor: the tour requires good weather. When conditions are right, this is exactly the kind of Iceland moment that feels simple, safe, and strangely quiet.
FAQ
What’s included in the kayaking tour?
The tour includes a professional guide, technical equipment, a kayak and paddle, and a dry suit.
Do I need prior kayaking experience?
No prior kayaking experience is necessary. The tour includes instruction and basic paddling techniques for beginners.
How long does the tour last?
The experience lasts about 2 hours 30 minutes.
Where do I meet the guide?
You meet at the Sólheimajökull glacier parking lot (221, 871, Iceland). The tour ends back at the meeting point.
What should I bring?
Bring warm clothing and an extra pair of socks. The tour does not include food and drinks.
What happens if weather is bad?
This experience requires good weather. If it’s canceled due to poor weather, you’ll be offered a different date or a full refund.
If you want, tell me your travel month (or whether you’ll be in the Ring Road area that day), and I’ll suggest what to wear and how to plan your timing around wind and lighting at Sólheimajökull.