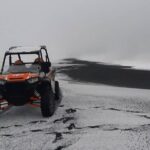
Ice is serious business here. This micro group ice-climbing outing on Sólheimajökull (near Vik) turns a short walk onto the glacier tongue into a hands-on session with real safety instruction, proper gear, and time to work up to different difficulty levels. It’s the kind of activity where the day feels controlled and calm, even though you’re stepping over crevasses.
Two things I love about how this is set up: you travel with a max of 4 people, so the guide can tailor tips as you go, and your key climbing kit is already included (harness, belt, crampons, ice axes). One consideration: you supply your own clothing and boots, so budget and pack smart, or you’ll feel cold and clunky fast.
The icing on the cake is the pacing. You start with a safety briefing and gearing up, then you cross ice features like crevasses and moulins before you even begin climbing. That sequence helps you build confidence before the fun part, not after.
In This Review
- Key highlights to know before you go
- Meeting on Sólheimajökull: gearing up before your boots hit ice
- Crossing crevasses and moulins: why the first glacier steps feel intense
- The climbing lesson: axes, crampons, harness, and the muscle memory part
- Exploring different glacier locations: getting multiple levels of difficulty in one session
- Pace and physical demands: moderate fitness means moving, not racing
- Price and what your $260 actually buys in Iceland terms
- Weather rules: plan for a glacier that can say no
- What the guide does right (and why people come away happy)
- Who should book ice climbing here (and who should think twice)
- Practical tips so you feel confident on the ice
- Should you book Hyperborea Tours for Sólheimajökull ice climbing?
- FAQ
- Where do I meet for ice climbing on Sólheimajökull?
- How long is the ice climbing experience?
- How many people are in the group?
- What climbing gear is included?
- What gear is not included?
- What level of fitness do I need?
- Is the tour offered in English?
- Does the tour require good weather?
- What is the cancellation policy?
Key highlights to know before you go
- Micro group (up to 4): more coaching time and less standing around.
- Full climbing kit included: harness, belt, crampons, and ice axes are taken care of.
- Safety first, then movement: a briefing at the start and technique coaching once you’re on the ice.
- Actual glacier travel: you cross crevasses and moulins before starting the climb.
- Practice on different spots: you can move to varied locations for different difficulty levels.
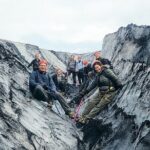
Meeting on Sólheimajökull: gearing up before your boots hit ice
You meet at Sólheimajökull, 871, Iceland, and the activity ends back at the same meeting point. Expect to start in the parking area, then spend about 15 minutes heading out to the glacier tongue. That short transfer matters more than it sounds: it gives the group a chance to settle in, get the rules in your head, and avoid the chaos that happens when everyone sprints straight from the car onto the ice.
Right away, you’ll do a safety briefing and gear up with the guide’s help. Since climbing involves using crampons and ice axes correctly, I like that you don’t just get handed equipment and sent off. This is where the guide sets expectations: where you should step, how you move your weight, and how the group travels together.
One practical note: the tour provides the climbing systems, but you bring your own winter clothing and boots. If you’re missing proper boots, it’s not just uncomfortable. Poor footing can make every step feel harder and less secure. Plan for cold, wet, and wind, even if the day starts out looking decent.
You can also read our reviews of more tours and experiences in Vik.
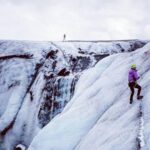
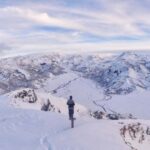
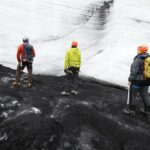
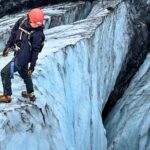
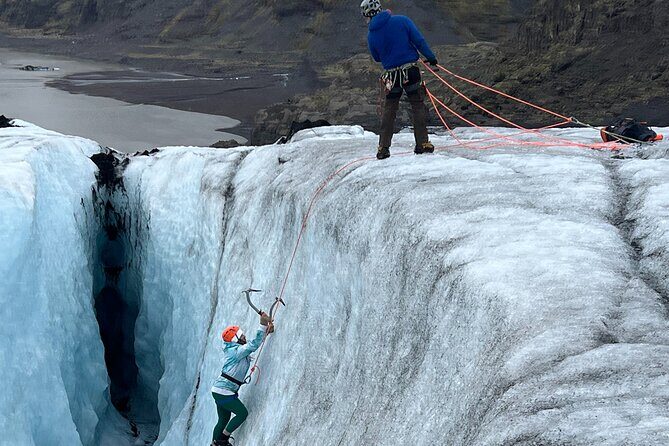
Crossing crevasses and moulins: why the first glacier steps feel intense
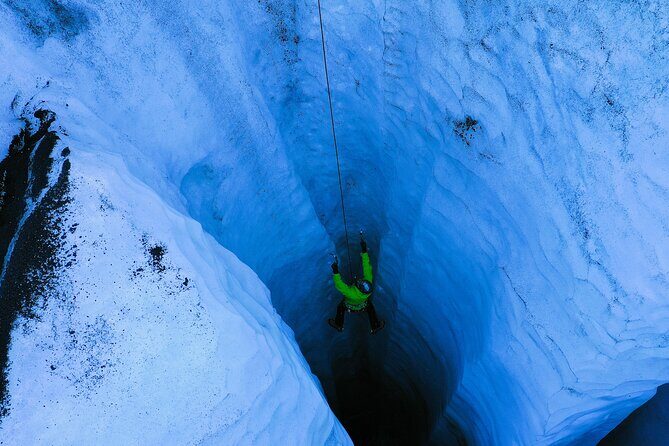
Once you’re on the glacier, the day doesn’t jump straight to scaling. You cross crevasses and moulins until you reach a spot that works for the climb. For most people, those words sound scary. In practice, what you’ll feel is focused and guided: you follow the guide’s route and you move in a controlled way rather than guessing where it’s safe to step.
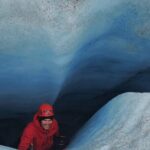
This is also the part of the day that helps you understand how the glacier works. Crevasses are cracks in the ice, and moulins are openings where meltwater runs down into the glacier. You’re not there to memorize glaciology. You’re there to learn how to travel across an icy surface while staying mindful of where the ground is solid enough to trust.
Because you’re in a small group of up to 4, you’ll likely have less pressure to keep up and more chance to ask questions in real time. That matters a lot when you’re trying to remember instructions while your legs are learning crampon life.
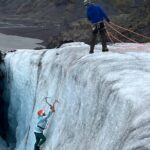
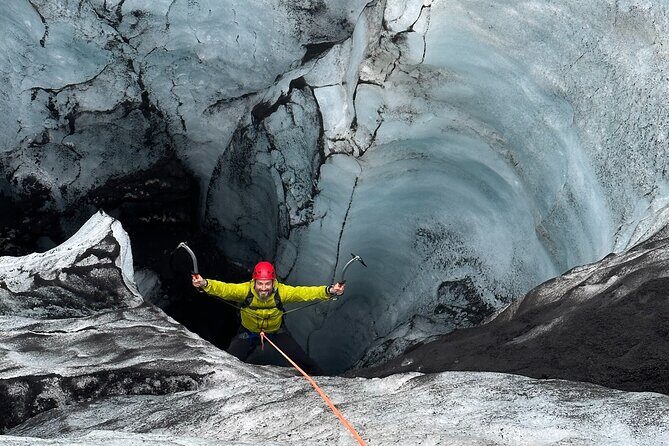
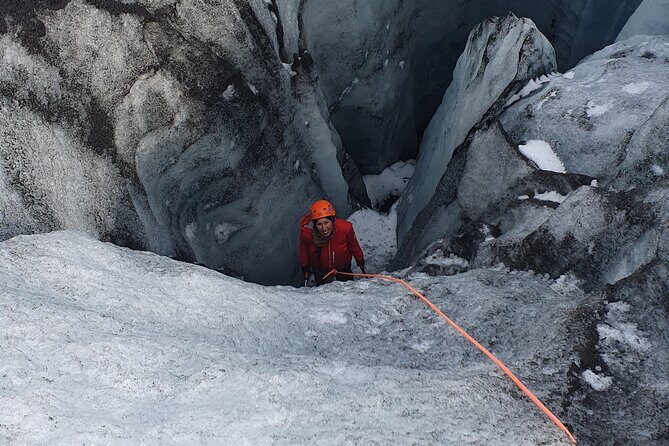
The climbing lesson: axes, crampons, harness, and the muscle memory part
When it’s time to start climbing, the guide helps you pick a good position and begins with technique—how to use your crampons, how to hold and place your ice axe, and how to move on the ice again after shifting your stance. The goal isn’t just to make you reach a higher point. It’s to give you repeatable movement skills so the climb feels like a sequence, not a collection of lucky steps.
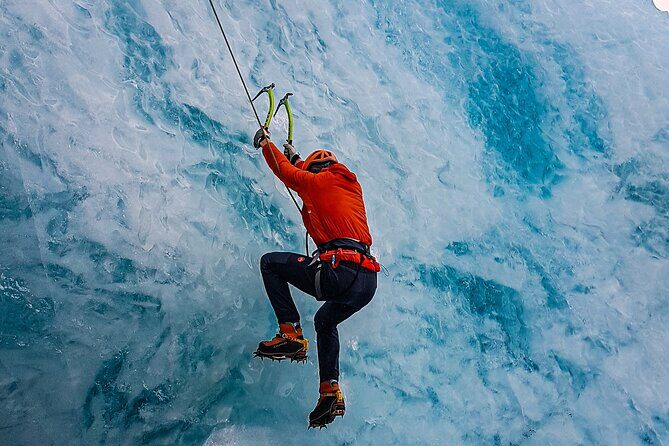
Your included gear is exactly what you need to practice safely:
- Crampons for traction on ice
- Ice axes for balance and controlled movement
- A harness and climbing belt for secure setup
- The guide controls how everything fits and functions during the activity
Here’s the value for you: ice climbing is partly nerves and partly technique. If you can place your weight confidently, your brain stops treating every step like a gamble. That’s why the guide’s coaching on movement after each technique shift is so important. You’re learning how to re-set, not just how to move once.
Also, the tour is offered in English, which makes a difference when you’re learning physical technique. You don’t want to spend your mental energy decoding instructions—you want to spend it on executing them.
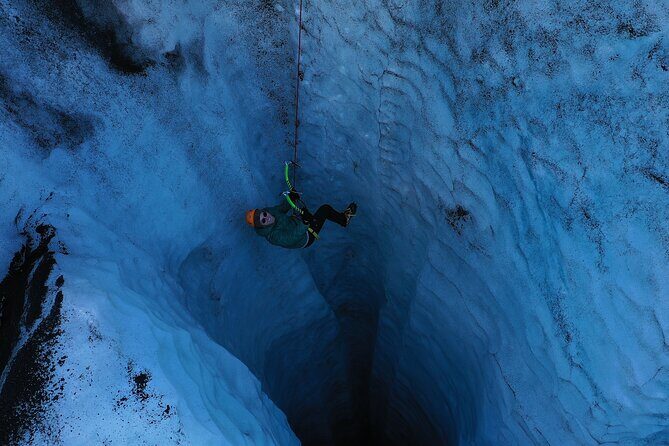
Exploring different glacier locations: getting multiple levels of difficulty in one session
One of the most appealing parts of this outing is the chance to explore different locations during the day. That means you’re not stuck doing the exact same climb on repeat. Instead, you can try areas that feel easier or more challenging, depending on the route and conditions.
This matters because ice climbing beginners often worry about being over their head. Here, you’re given a structure where you can work up, practice, and adjust. If you’re having a great time on one section, you keep building. If one part feels steeper, you get coached and you still move forward.
From a value standpoint, it’s also a smart way to use your 4-hour window. You’re not just buying time on ice—you’re getting multiple “mini experiences” within the same day: travel across glacier features, then climb practice, then another opportunity to test your skills.
Pace and physical demands: moderate fitness means moving, not racing
The tour asks for moderate physical fitness. Based on the structure, that usually translates to things like walking on uneven icy ground, keeping your balance with crampons, and doing short bursts of effort during climbing.
I’d treat this as an activity for people who can handle a workout. Not a marathon. Not a couch-to-peak situation. If you have mobility limitations or balance issues, it may be a struggle, especially once you’re stepping over glacier terrain like crevasses and moulins.
The upside is that the time is controlled: about 4 hours total, with safety briefing, gearing up, movement to climbing spots, and technique coaching. You’re not out there for a full day, which makes it more approachable for first-timers.


Price and what your $260 actually buys in Iceland terms
At $260 per person for about 4 hours, this isn’t a cheap activity—but ice climbing usually isn’t. What makes it feel fair is that you’re getting the equipment you’d otherwise need to figure out: crampons, ice axes, a harness, and a climbing belt are included.
What’s not included is just as important: clothing and boots. In Iceland, good cold-weather clothing isn’t optional. It’s what keeps the experience fun instead of miserable. So the real cost equation isn’t only the tour price. It’s also whether you show up with the right gear for ice and wind.
Also, the micro group size helps justify the price. Up to four people means more direct instruction and fewer hands-on minutes lost to crowd management. When you’re learning physical technique, that one-on-one feel is part of what you’re paying for.
If you’re comparing options, I’d ask yourself a simple question: Do you want a guided learning session with included climbing hardware, or do you want a more general glacier walk? This is the first type.
Weather rules: plan for a glacier that can say no
This activity requires good weather. If it’s canceled due to poor weather, you’ll be offered a different date or a full refund. That’s the right approach for glacier travel, because visibility and ice conditions change fast.
I always tell people: don’t treat this like a guaranteed box-check. Iceland weather is real. If your schedule is tight, you’ll want a bit of flexibility built into your day.
The good news is the cancellation policy is free up to 24 hours in advance, so you’re not stuck in limbo if the forecast turns.
What the guide does right (and why people come away happy)
The overall feedback here is extremely strong: 5/5 with 100% recommendation in the provided sample. The themes are practical—guides who are friendly, helpful, and genuinely tuned into what the group needs.
Even if you’re booking last minute, the structure helps. You gather, brief, gear up, then you go step-by-step. One pair in the feedback did this super last minute and still walked away saying it was among the most fun things they’d done.
No one should expect zero nerves on ice. But a good guide reduces the guesswork. You spend more time learning and less time worrying.
Who should book ice climbing here (and who should think twice)
This outing is a strong match if:
- You want an active glacier experience near Vik
- You’re curious about ice climbing technique, not just photos
- You like small groups and hands-on coaching
- You can manage moderate physical effort on icy ground
It may not be ideal if:
- You don’t have proper boots and cold-weather clothing
- You’re uncomfortable with stepping near glacier features like crevasses
- You’re looking for a purely scenic walk with no real climbing focus
If you’re a first-timer, this is a good route because you get instruction and a controlled start. If you already climb elsewhere, you might still appreciate the technique focus and the chance to test different difficulty levels during the session.
Practical tips so you feel confident on the ice
Here’s how to set yourself up for a smoother, happier day—based on what this tour needs from you.
- Wear warm layers you can move in, and plan for wind. The guide provides the climbing gear, but you own the comfort.
- Bring or arrange boots that work well in cold and on uneven ground. The tour explicitly does not include boots.
- Expect to walk on uneven ice surfaces right away. If you’re wearing slippery footwear for the transfer, you’ll feel it immediately once crampons go on.
- Keep your pace steady. On glacier terrain, fast can mean sloppy.
- Listen carefully during the safety briefing. It affects everything after.
And yes, you’ll probably feel a little adrenaline when you’re on the glacier tongue. That’s normal. Your job is to follow the plan, place your feet as taught, and enjoy the fact that you’re doing a real climbing skill in a place that looks like it belongs on another planet.
Should you book Hyperborea Tours for Sólheimajökull ice climbing?
If you want a small-group ice-climbing session with included gear, real safety coaching, and time to practice on different glacier spots, I think this is an easy yes.
Book it if:
- You’re in the Vik area and want a high-impact activity that still feels structured
- You want up to 4 travelers and direct guide attention
- You’re okay bringing your own cold-weather clothing and boots
- You can handle moderate physical effort and stepping over rugged glacier terrain
Hold off if:
- You don’t have suitable boots and winter layers
- Your schedule is too inflexible for weather-related changes
In short: for $260 you’re buying instruction, traction tools, and a guided route on a real working glacier. That’s the kind of value that turns a scary word like crevasse into something you can safely navigate—step by step.
FAQ
Where do I meet for ice climbing on Sólheimajökull?
You start at Sólheimajökull, 871, Iceland, and the activity ends back at the same meeting point.
How long is the ice climbing experience?
It runs for about 4 hours.
How many people are in the group?
This activity has a maximum of 4 travelers.
What climbing gear is included?
Your climbing belt, ice axes, harness, and crampons are included.
What gear is not included?
The tour does not include clothing or boots.
What level of fitness do I need?
You should have a moderate physical fitness level.
Is the tour offered in English?
Yes, the experience is offered in English.
Does the tour require good weather?
Yes. It requires good weather, and if it’s canceled due to poor weather you’ll be offered a different date or a full refund.
What is the cancellation policy?
You can cancel for a full refund up to 24 hours in advance of the experience start time.