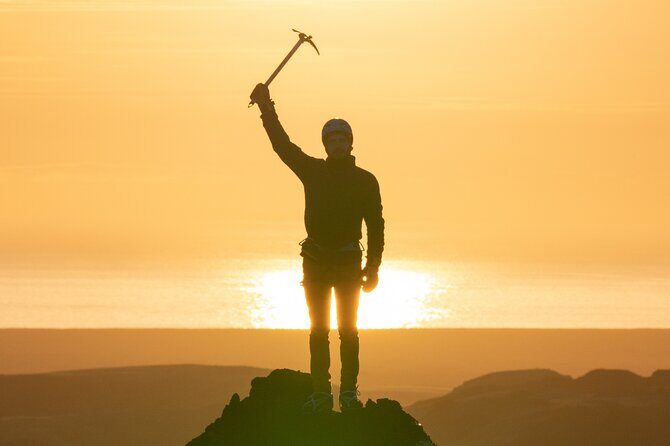
Cold air. Real traction.
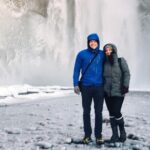
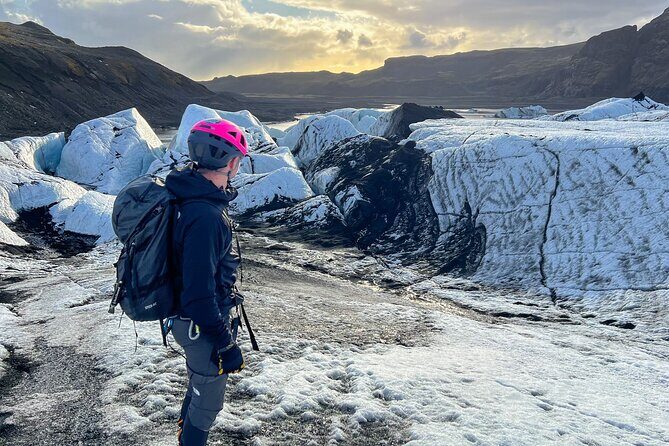
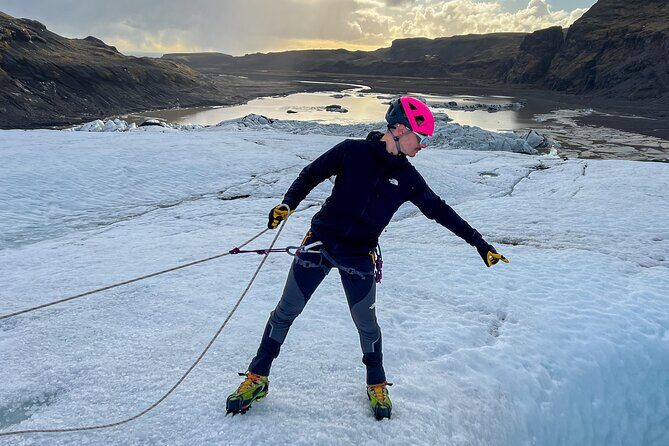
A glacier climb at Sólheimajökull is one of those Iceland activities that feels both wild and surprisingly teachable. What I like most is the private setup with close guidance, plus the fact that you’re not just dropped on the ice—your guide gets you ready step by step. Gear is also handled for you: helmets, crampons, harnesses, and ice axes are provided so you can focus on learning rather than hunting equipment.
Another strong point is the clear attention to safety checks—your boots are inspected and, if they don’t meet the standard for ice climbing, you’ll be asked to rent proper boots nearby. The one thing to consider is that the experience depends on weather, so if conditions are poor you may need a different date to climb (which is normal for glacier work, not a “maybe later” kind of situation).
In This Review
- Quick Hits: Why This Sólheimajökull Tour Feels Worth It
- Sólheimajökull Ice Climbing With a Private Guide: What the Day Really Feels Like
- Reykjavik Transit vs. Self-Getting There: Plan for the Parking Lot Reality
- Price and Value: $392.21 for Skills, Gear, and Guide Time
- Gear Up the Right Way: Boots, Harnesses, Helmets, and Crampon Fit
- The 20-Minute Glacier Walk: Where You Learn Crampon Footwork
- Climbing on Ice: The Terminal Route, the Plateau, and Your Best Spot
- What Makes This Tour Private (and Why You’ll Probably Care)
- Terrain, Timing, and Moderate Fitness: What You Should Expect Physically
- Weather Rules and Realistic Flexibility
- What to Bring (and What the Tour Gives You)
- How to Decide: Should You Book This Sólheimajökull Glacier Adventure?
- FAQ
- Where does the tour start and end?
- Is transportation to the glacier included?
- What glacier gear is included?
- Do I need special climbing boots?
- How physically demanding is it?
- What happens if weather is bad or I need to cancel?
Quick Hits: Why This Sólheimajökull Tour Feels Worth It
- Private glacier time: only your group participates, so coaching doesn’t get diluted
- Boot and gear safety first: fit checks before you ever step onto the ice
- Real skills, not just photos: crampons, harness, and ice-axe walking taught on the glacier
- Most of your time on the climbing section: you’re on the ice for the key action
- Guided away from crowd lines: you follow a route designed for safety and the group’s level
- Hands-on highlights: climbing on a moulin or a crevasse wall is part of the experience
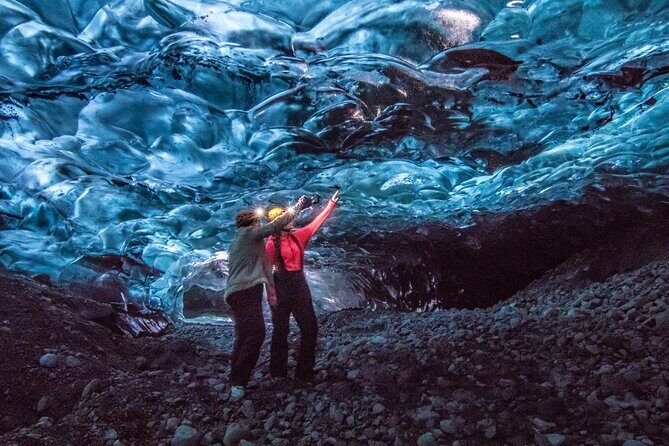
Sólheimajökull Ice Climbing With a Private Guide: What the Day Really Feels Like
This is not the kind of glacier outing where you spend half your time waiting and the other half taking turns posing. The flow is more like: meet, get checked, get trained, and then go do the thing—ice climbing—while your guide adjusts to your ability.
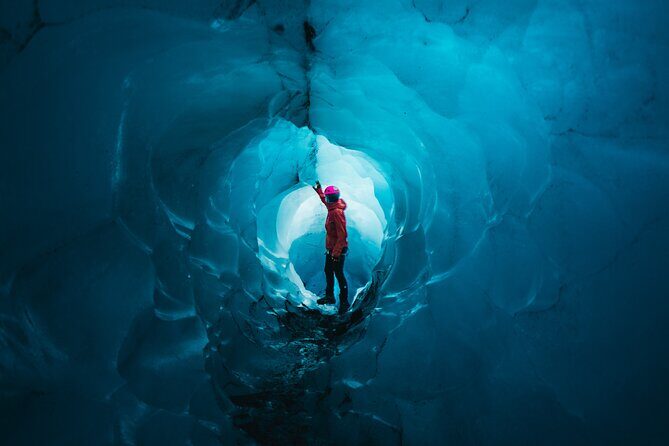
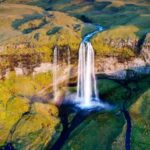
The glacier itself, Sólheimajökull, can look like a frozen moonscape from shore. Up close, it’s a working world: rough ice textures underfoot, crevasses shaping the route, and the terrain constantly changing. A good guide matters here, because you’re learning how to move on ice safely—not just how to stand still for a few shots.
Your guide is also the difference between feeling nervous and feeling capable. In the best moments of the reviews, the guide’s name comes up—Valerio—and the theme is consistent: he makes people feel comfortable while still keeping safety serious. That combination is what turns an intimidating activity into a genuine confidence-builder.
You can also read our reviews of more private tours in Reykjavik
Reykjavik Transit vs. Self-Getting There: Plan for the Parking Lot Reality
The highlights say there’s round-trip transit from Reykjavik, which sounds great for convenience. At the same time, the details list transportation as not included. That mismatch can happen when a provider offers pickup options but doesn’t treat them as part of the base package every time—so treat this as a checklist item, not a guarantee.
What you can plan for with confidence is the meeting point and the logistics around it:
- The tour starts and ends at the Sólheimajökull glacier parking lot
- Once you’re at the lot, there’s a parking fee you pay online, listed as 750–1000 ISK via parka.is
If you’re driving yourself, keep a little extra time buffer. If you’re relying on pickup, confirm the exact pickup point and timing when you book—glacier tours run on tight safety windows.
Price and Value: $392.21 for Skills, Gear, and Guide Time
At $392.21 per person for about 4 hours 30 minutes, this isn’t a budget add-on. But when you look at what’s included, the price starts to make more sense.
You’re paying for:
- A private coaching environment (only your group)
- Safety-focused training and gear checks
- All glacier climbing gear: helmets, crampons, harnesses, ice axes
- Guided time on the glacier, including the route through the terminal area and up to the plateau where climbing happens
If you’ve ever tried to book glacier activities as a DIY project, you’ll know how expensive and time-consuming it can get fast—gear alone isn’t cheap, and the real cost is the training and safety system. This tour bundles that into one package. For me, the value is strongest if you actually want to learn and climb, not just stand on ice for a quick taste.
Also note that this kind of experience tends to book ahead. The average booking lead time here is 49 days, so if you’re traveling in peak season, reserve early to avoid being forced into less convenient slots.
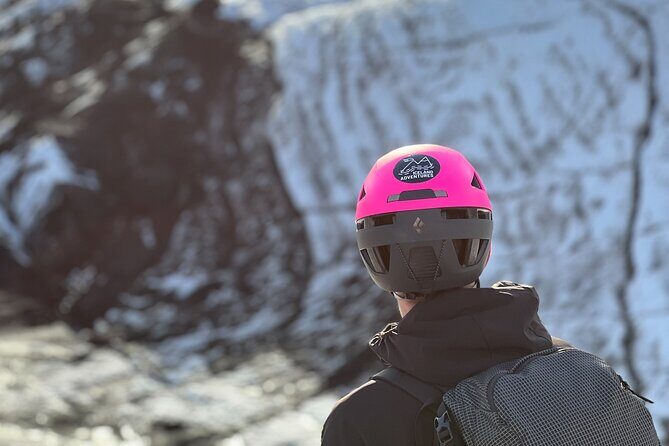
Gear Up the Right Way: Boots, Harnesses, Helmets, and Crampon Fit
One of the clearest “this guide is serious” moments happens before you even step onto the glacier. Your guide inspects your boots after check-in. If your boots don’t match the safety standard for ice climbing, you’ll be asked to rent climbing boots at a nearby company.
That detail matters more than it sounds. Crampons work by gripping the boot’s sole correctly. If the fit isn’t compatible, you lose traction and safety margins. You might still be eager to climb—but without the right boots, the climb simply can’t happen the way it should.
Then comes the gear lesson:
- How to wear the harness
- How the helmet should fit
- How to walk safely while holding ice axes and using crampons
Even if you’re a confident walker, you’re learning a new balance system. Plan to look a bit clumsy for the first few minutes. That’s part of the training. The goal is to leave the gear-up stage with the basics locked in so you can focus on climbing, not fiddling with equipment.
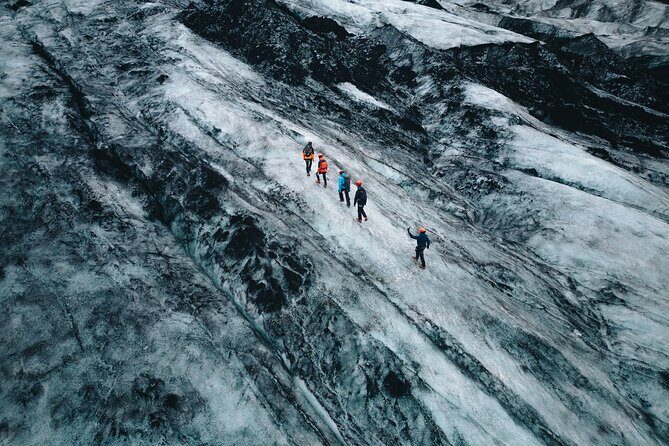
The 20-Minute Glacier Walk: Where You Learn Crampon Footwork
After gear up, you walk about 20 minutes from the parking lot to reach the front of the glacier. That stretch isn’t just transit—it’s time to get your body warmed up and for your guide to set the tempo.
Once you’re at the glacier, you’re introduced to crampons:
- How to wear them properly
- How to walk with them safely
- How to handle ice axes in a controlled way
You’ll then start moving in a straight single line behind your guide. This matters because glacier travel is a team sport. The guide needs to pace the group for safe spacing and consistent footing, especially if you’re moving across uneven terminal terrain.
If you’ve never used crampons before, don’t fight it. Let your guide correct your stance early. That’s the difference between feeling steady and feeling like you’re inventing new ways to slip.


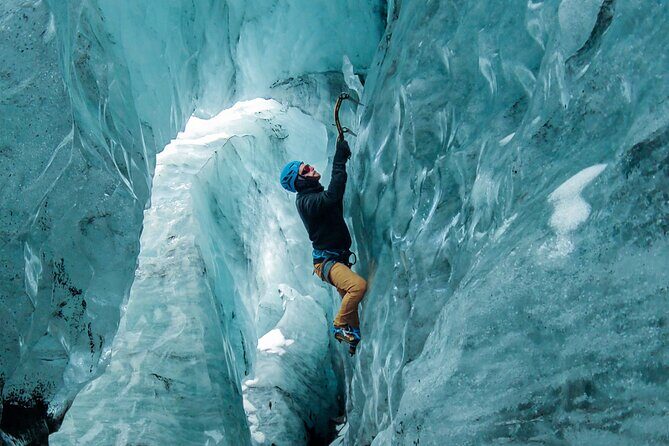
Climbing on Ice: The Terminal Route, the Plateau, and Your Best Spot
Here’s where the day turns from training to real action.
You follow a guided path through the glacier terminal area until you reach the plateau. Along the way, your guide is also making decisions based on group fitness and experience. That means you’re not stuck doing the same exact move if your group is more cautious or more adventurous.
Once on the plateau, your guide finds the best climbing spot for your group. This is the part that tends to get people hooked:
- Climbing on a moulin
- Or climbing on a crevasse wall
Spending most of your time here is a big deal. Ice climbing isn’t like standing on a viewpoint where the hard part is weather. It’s hands-on movement on real glacier features, and you learn by doing—while your guide watches, supports, and adjusts.
Also, following a guide’s line helps you experience the glacier without turning it into a self-guided guessing game. You’re still getting adventure, but the structure keeps it safe and educational.
What Makes This Tour Private (and Why You’ll Probably Care)
You’re with only your group. That sounds like a simple detail, but on a glacier it changes the whole feel of the experience.
In a private setting:
- The guide can adapt instruction to your pace
- Gear checks and corrections can happen faster
- You spend less time waiting for the person who needs extra time to get comfortable
The reviews repeatedly point to this kind of personal attention, with Valerio highlighted for both knowledge and calm coaching. If you want to ask questions, get feedback, or try the climbing moves without feeling rushed, private is the way to go.
If you’re coming in with anxiety about falling or making mistakes, the private format also helps. A guide can slow the pace and build confidence step by step.
Terrain, Timing, and Moderate Fitness: What You Should Expect Physically

This activity asks for moderate physical fitness. That doesn’t mean you need to train for a marathon. It does mean you should be comfortable with:
- Walking on uneven ground
- Standing and moving in cold conditions
- Using controlled climbing motions while wearing gear
Cold also changes everything—your muscles don’t react the same way. So if you normally get stiff on chilly days, bring that reality into your planning. The tour structure helps, though: you get guided practice before you go straight into climbing.
And because the day runs about 4 hours 30 minutes, you’ll want to show up ready to work, not just sightsee. Wear layers you can adjust. Drink water when you can. You’ll feel better and you’ll learn faster.
Weather Rules and Realistic Flexibility
This experience requires good weather. Glacier work can be unsafe in poor visibility or rough conditions, and it also affects ice surface conditions and overall stability.
If the tour is canceled due to poor weather, you’ll be offered a different date or a full refund. In other words, you’re not stuck with an unusable voucher and a shrug. Still, be ready for the planning reality: in Iceland, you give your schedule a little slack.
What to Bring (and What the Tour Gives You)
The big win here is that the tour provides key technical gear:
- Helmets
- Crampons
- Harnesses
- Ice axes
That’s a relief, because it means you’re not hauling climbing equipment from home. The one gear area you should pay close attention to is footwear:
- Your boots get inspected at check-in
- If they don’t meet the ice-climbing standard, you’ll rent proper climbing boots nearby
Beyond boots, think in terms of cold-weather comfort:
- Warm layers that fit under/around the harness area
- Gloves you can move in
- Sunglasses or eye protection if it’s bright
If you’re unsure about anything, it’s worth asking when you book—because the boots decision happens early, and the day is built around getting you onto the ice.
How to Decide: Should You Book This Sólheimajökull Glacier Adventure?
Book it if you want real instruction and actual climbing, not just a scenic glacier walk. This private format, plus the gear included, makes it a strong choice if you:
- Want hands-on coaching
- Are open to learning crampon and ice-axe basics
- Care about safety and clear guidance from the start
- Like the idea of climbing on features like a moulin or crevasse wall
Skip it or reconsider if:
- You’re very sensitive to cold and mobility demands
- You can’t meet the moderate fitness level
- You don’t want to deal with the boots fit check (and possible rental)
My practical advice: confirm the transport arrangement when you book, because the information about Reykjavik transit vs. transportation not included could mean different pickup setups. Then, plan for weather variability with a flexible schedule. If you do those two things, you’re set up for a day that’s exciting, structured, and genuinely confidence-changing.
FAQ
Where does the tour start and end?
The tour starts at the Sólheimajökull glacier parking lot (221, 871, Iceland) and ends back at the same meeting point.
Is transportation to the glacier included?
Transportation to reach the glacier is listed as not included, even though the highlights mention round-trip transit from Reykjavik. It’s smart to confirm what pickup, if any, is included when you book.
What glacier gear is included?
Helmets, crampons, harnesses, and ice axes are included.
Do I need special climbing boots?
Your guide inspects your boots. If they don’t meet the ice-climbing safety standard, you’ll be asked to rent climbing boots nearby. Without proper boots, you won’t be able to climb.
How physically demanding is it?
You should have a moderate physical fitness level.
What happens if weather is bad or I need to cancel?
The experience requires good weather. If it’s canceled due to poor weather, you’ll be offered a different date or a full refund. You can cancel up to 24 hours in advance for a full refund.