Cold ice can change your attitude.
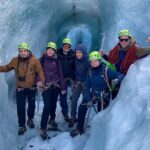
This Sólheimajökull Ice Climb and Glacier Hike turns the word epic into something practical: you’ll learn real ice-climbing basics, then use them on dense blue ice with crevasses and ice walls close enough to feel the scale. It’s also one of the outlet glaciers tied to Chasing Ice, the climate documentary people keep bringing up for a reason. Depending on conditions and your guide, you may also get a chance at a bonus stop like an ice cave.
I like two things a lot here. First, the certified glacier guide focus on safety and patience. Guides such as Maria, Adam, Hang, and Helki have a reputation for calm instruction and steady support, which matters when you’re nervous or new to crampons. Second, the mix of hiking and climbing means you get more than one kind of glacier experience in one session.
One thing to consider: this is physical, cold, and mentally sharp. You’re on uneven ice, you need gloves, and it helps if you can handle exposure in a controlled way. Also, it’s not suitable for children under 12.
In This Review
- Key points before you go
- Sólheimajökull Ice Climb: What makes this 4-hour glacier session click
- Meeting at the parking lot: gear-up time and your first glacier rules
- Safety briefing and glacier skills you’ll use immediately
- The hike in: toward the outlet glacier’s ice formations
- The ice wall climb: crampons, rope systems, and crevasse awareness
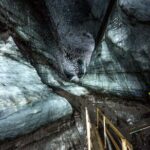
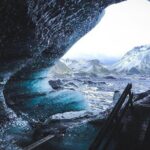
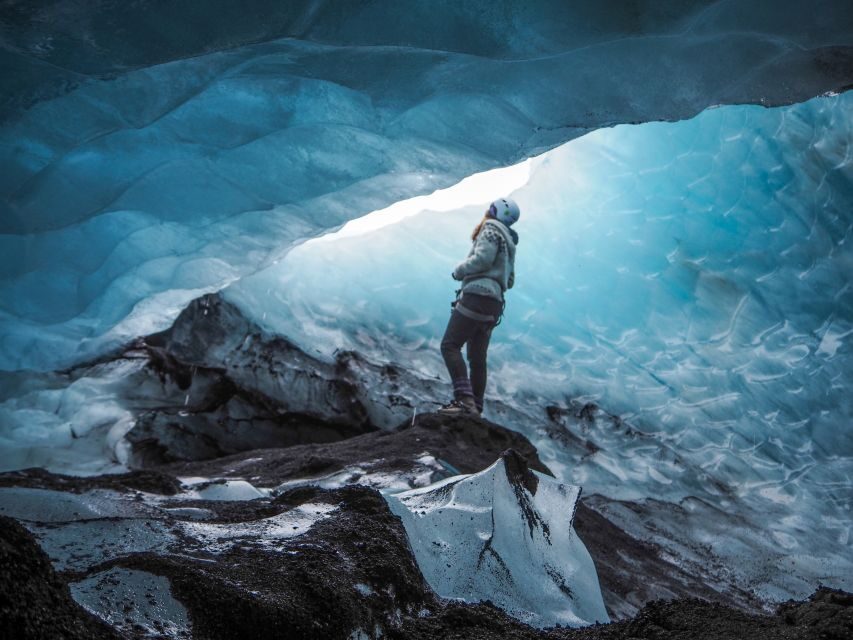
- Bonus time and ice-cave possibilities when conditions allow
- What’s included, what you must bring, and why gloves are not optional
- Price and value: is $241 for 4 hours fair?
- Who should book this ice climb, and who should skip it
- Quick practical checklist for your day
- Should you book Sólheimajökull Ice Climb?
- FAQ
- How long is the Sólheimajökull Ice Climb and Glacier Hike?
- Where do we meet for the tour?
- What equipment is included?
- What should I bring with me?
- Is there a child age limit?
- What are the language and group size details?
Key points before you go

- Small group (up to 6) so you get more hands-on time during the rope and crampon setup
- Certified glacier guide with instruction on ice-climbing techniques, not just sightseeing
- Full climbing kit included: boots, helmet, harness, crampons, ice axe, and ropes
- 4 hours from start to finish with a structured flow: briefing, hike, climb time, then return
- Bring your warm layers and rain gear since Iceland will do Iceland things
- Coffee and chocolates included, because cold work should end with a small reward
Sólheimajökull Ice Climb: What makes this 4-hour glacier session click
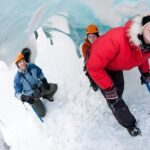
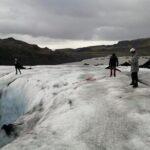
Sólheimajökull is one of those glaciers that feels close and real. Not a distant postcard. You’re walking on it, then climbing parts of it where the ice shows off its cracks, textures, and changing shape. That’s the hook.
The bigger reason this experience works so well is that you do more than “watch ice.” You’re taught how to move on it. A lot of glacier tours stop at standing near something impressive. Here, you learn the basics of ice climbing and then use that knowledge on ice walls under safe guidance.
And yes, there’s the movie connection too. This outlet glacier was featured in Chasing Ice, which gives the day an extra layer beyond adventure. You’re not just getting exercise; you’re also standing on a living system that keeps changing.
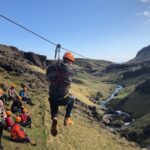
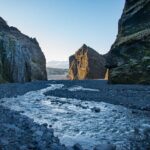
You can also read our reviews of more hiking tours in Vik
Meeting at the parking lot: gear-up time and your first glacier rules
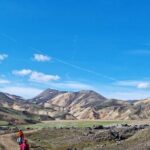
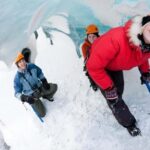
You meet at the Sólheimajökull Glacier parking lot, and the day begins with setup and orientation. You’ll head out on foot toward the ice, but before you’re anywhere near climbing, you get organized.
What I like about starting here is that it keeps the whole thing sane. You’re not wandering around looking for a trailhead. You’re with your guide and your small group, and the goal is clear: get you safe, get you moving, then get you climbing.
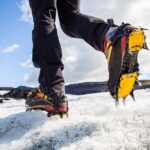
Gear matters on glaciers because “cold” isn’t the only issue. It’s traction, balance, and protection. You’ll be given climbing boots and the core glacier kit: helmet, harness, crampons, ice axe, and ropes. That takes a lot of guesswork out of planning.
Safety briefing and glacier skills you’ll use immediately
The schedule is built around learning. You’ll get a safety briefing for about 30 minutes before serious time on the ice.
This is not just a formality. Ice climbing has a specific rhythm: secure footing, controlled movements, and knowing what to do if you’re unsure. A good guide helps you practice those basics on the way in, not after you’re already committed to the harder parts.
From what you’ll see during instruction and setup, the most important early skills tend to be:
- how your crampons change your steps
- how to hold and position the ice axe
- how you connect to the harness and rope system
- how the group moves to reduce risk and stress
The guides described in past departures (including Maria, Adam, and Kevin) are consistently praised for being patient and safety-first. That’s a big deal if you’re experienced hiking but new to vertical ice. You’ll likely feel more capable after the briefing, not just more informed.
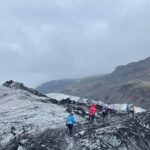
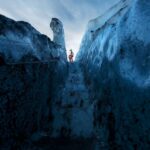
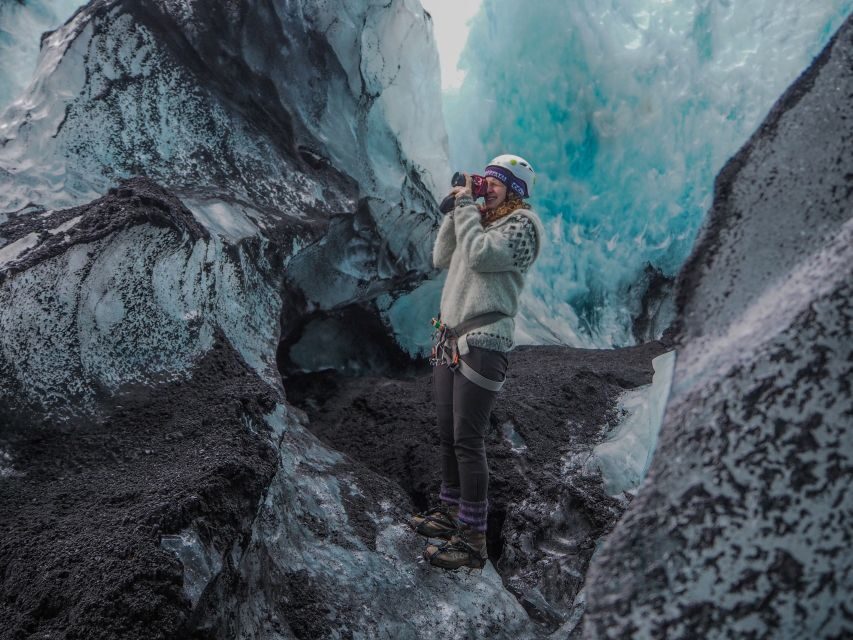
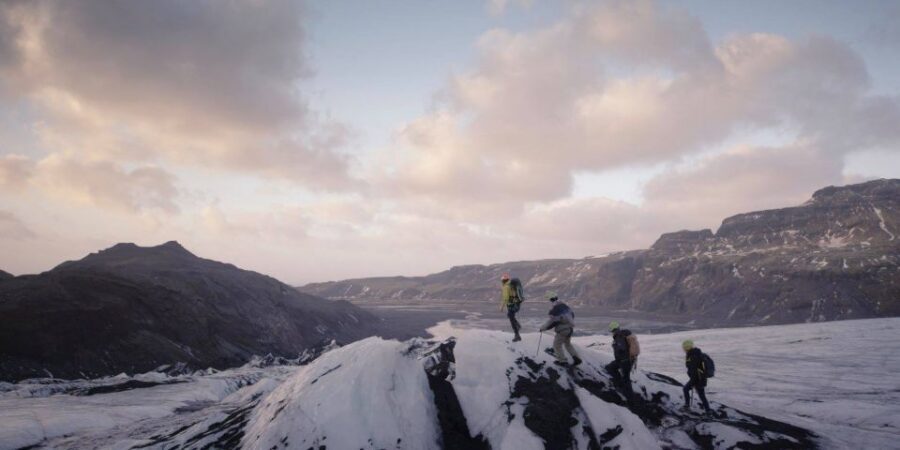
The hike in: toward the outlet glacier’s ice formations
After setup and briefing, you’ll spend about an hour hiking on the glacier and getting closer to the climb area. You’ll also have a short walk segment before and after the main climbing window, which helps you settle in.
This part is more than transportation. It’s your glacier introduction. You’ll see ice formations, crevasses, and tunnels up close, and that changes your understanding fast. In ordinary landscapes, cracks are scary in pictures. On a glacier, cracks are part of the terrain. Your guide helps you read what you’re seeing and where you should focus your attention.
One practical tip: keep your eyes up and your body relaxed. When people get tense, they tend to shorten their stride and fight their footing. On ice, you want steady, not frantic. A calm guide can help you find that rhythm, especially if you’re a nervous climber or not as fit as you thought you’d be on day one.
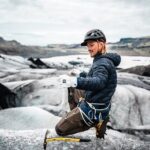
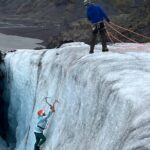
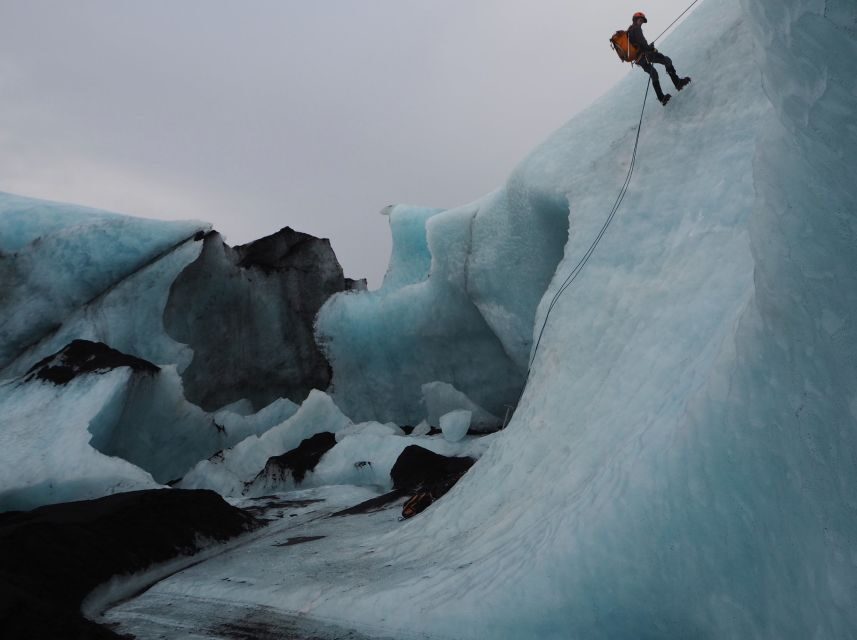
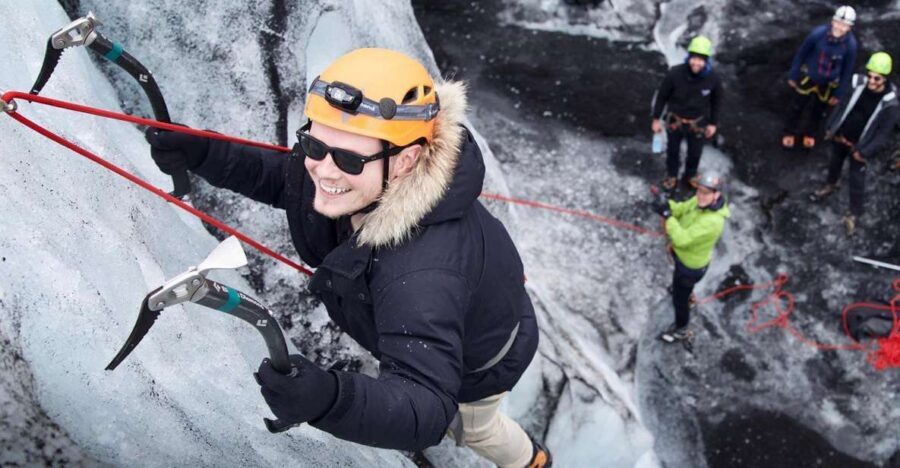
The ice wall climb: crampons, rope systems, and crevasse awareness
This is the headline. You’ll climb the ice walls of Sólheimajökull and get real exposure to what ice climbing feels like—dense ice under your tools, gravity pulling down, and your whole body doing careful work.
A big part of the value here is the “how,” not the “look.” Your guide sets up the ice-climbing system and talks you through technique before you start going up. That setup phase is where safety becomes something you can feel, not just a rule on paper.
During the climb, you’ll likely do a mix of:
- careful steps with crampon points finding purchase
- controlled axe placements
- body positioning that keeps you stable on uneven ice
And yes, the views can be striking. But don’t treat the climb as sightseeing. Treat it like a guided skills session on a steep medium that happens to be beautiful.
If you’re worried about heights, you’re not alone. Several past participants described nervousness and still being able to climb to the top with reassurance. The takeaway: you don’t have to be fearless. You do need to follow instructions closely and let your guide handle safe photo spots and the pacing of the group.
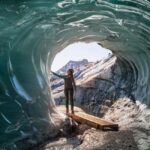


Bonus time and ice-cave possibilities when conditions allow
Some groups may add a bonus check-out of an ice cave at the glacier. The exact plan can vary based on conditions and what’s workable in the area that day.
Here’s how to think about this: if your day includes extra exploration, it’s usually because your guide can manage the safety plan while keeping the group moving. It’s not random freelancing. So if you care about a photo-heavy day, ask your guide what they think is possible once you’re on the ice.
Either way, the “extra” is less about adding a random attraction and more about seeing more of how ice reshapes itself.
What’s included, what you must bring, and why gloves are not optional
The tour includes a lot of the expensive or annoying stuff:
- Certified glacier guide
- Climbing boots
- Glacier equipment: helmet, harness, crampons, ice axe, and ropes
- Coffee and chocolates
So you don’t have to rent or source the core gear. That alone can make the experience feel like better value than it first appears.
What you must bring is what keeps you comfortable and safe:
- Warm clothing
- Hiking shoes (the tour also gives boots, but your footwear plan matters for layering and support)
- Rain gear
- Gloves are necessary to protect your hands
If you’ve ever tried to handle cold gear without real gloves, you’ll understand why this matters. Your hands are constantly doing small tasks all day. If they’re cold, your mood drops fast.
Price and value: is $241 for 4 hours fair?
The price is listed at $241 per person for about 4 hours. For glacier activities, that number isn’t random. You’re paying for:
- a certified glacier guide
- a small group size (limited to 6)
- specialized equipment (crampons, axe, rope/harness system)
- structured time: briefing, hiking, climb support, and return
What I like about this value setup is that it reduces your pre-trip stress. You’re not shopping for gear at the last minute. You’re not paying separate guiding add-ons. You show up at the parking lot, get suited, learn the basics, and climb.
Could you find a cheaper glacier walk elsewhere? Sure. But if you want the ice-climbing skills and the hands-on rope-and-traction experience, the cost makes more sense. You’re essentially buying instruction plus equipment plus time on a place that demands expertise.
Also, small group size matters on ice. With fewer people, the guide can watch your footing and adjust the pace without turning the climb into a waiting game.
Who should book this ice climb, and who should skip it
This tour fits best if you:
- want something more active than a standard glacier hike
- are okay with cold and wet conditions (and bringing the right layers)
- like guided skills, not just viewing
It’s not suitable for children under 12, so if you’re traveling as a family, plan a different glacier activity for kids.
If you’re an experienced hiker, that’s a plus, but ice climbing adds a new set of skills. The good news is that guides have been described as patient and reassuring with first-timers. You don’t need rock-climbing experience. You do need to listen, move carefully, and accept that the day is about learning.
And if you’re worried about heights, don’t let that automatically scare you away. Ask your guide about pacing and where you’ll feel most comfortable. A safety-conscious guide can often help you manage exposure during the climb and at photo stops.
Quick practical checklist for your day
Before you go, set yourself up to feel competent, not frantic.
Bring:
- Warm layers
- Rain gear
- Gloves
- Hiking shoes
Wear:
- clothing you can move in
- layers you won’t fight once you’re harnessed and stepping onto ice
Plan for:
- a full cold-weather workout
- focused attention during the safety and climbing segments
On the “mental” side, go in expecting short bursts of effort followed by guided resets. Glacier climbing is not constant cardio. It’s controlled movement, tool use, and careful balance.
Should you book Sólheimajökull Ice Climb?
I’d book it if you want the glacier to feel hands-on. This isn’t a drive-by photo stop. It’s a learn-and-climb experience with a small group and equipment included, so you can focus on doing the activity rather than troubleshooting your gear.
You might skip it if:
- you strongly dislike cold and wet conditions and don’t want to dress for it
- you’re traveling with kids under 12
- you’re not willing to follow tight safety guidance and pacing
If you’re on the fence, I’d base your decision on one question: do you want to come away with actual ice-climbing basics and the confidence that comes from a guided climb? If yes, this is a very solid bet on the Sólheimajökull side of Iceland.
FAQ
How long is the Sólheimajökull Ice Climb and Glacier Hike?
The duration is about 4 hours. Check availability to see starting times.
Where do we meet for the tour?
Meet at the Sólheimajökull Glacier parking lot.
What equipment is included?
You’ll get climbing boots and glacier equipment including helmet, harness, crampons, ice axe, and ropes.
What should I bring with me?
Bring warm clothing, rain gear, gloves (necessary), and hiking shoes.
Is there a child age limit?
Yes. The activity is not suitable for children under 12.
What are the language and group size details?
The tour is guided in English and is a small group limited to 6 participants. It also offers free cancellation up to 24 hours in advance for a full refund, and reserve now & pay later is available.