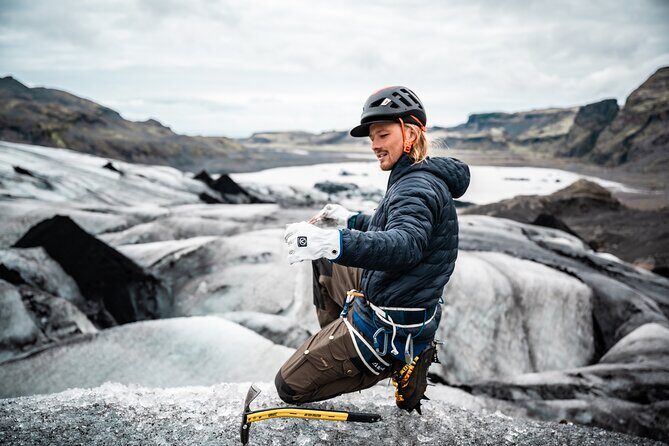
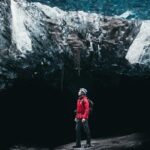
Glacier walking at Skaftafell gets serious fast. This Falljökull adventure takes you into the more rugged, less crowded parts of the glacier system, with a certified guide and a small group capped at 8. You’ll start with a modified 4×4 ride in a Land Rover Defender, then step onto the ice for a guided trek that actually uses your time well.
I love two things most: you get to go higher than the typical quick stop and see more of the glacier’s changing ice features, and you get real-world crampon instruction and safety coaching right at the edge before you move deeper onto the ice. The main drawback is physical: this is a moderate hike that requires you to comfortably walk 6 km on uneven terrain with about 250 m elevation gain, and it’s not a good fit if that sounds like too much.
In This Review
- Key highlights worth your attention
- Falljökull adventure: the real reason this hike feels different
- Meeting at Skaftafell Terminal and what the 15-minute drive really does
- Gear and crampons: the part that can make or break your confidence
- The glacier walk on Falljökull: how you get “farther” without going reckless
- Lunch at the top: short break, big payoff
- Photos and unforgettable ice moments (and how not to rush them)
- Fitness reality check: 6 km, uneven ground, and 250 m gain
- The $199 value: why the price makes sense for what’s included
- What to bring for cold ice and long steps
- Weather changes plans on glaciers, so trust the safety call
- Should you book the Skaftafell extra small group glacier adventure?
- FAQ
- How long is the tour total?
- How big is the small group?
- Where do I meet the tour?
- Is transportation included?
- What glacier equipment is included?
- Are hiking boots included?
- What fitness level do I need?
- Is this tour suitable for kids?
- What should I bring?
- What if weather is dangerous?
Key highlights worth your attention

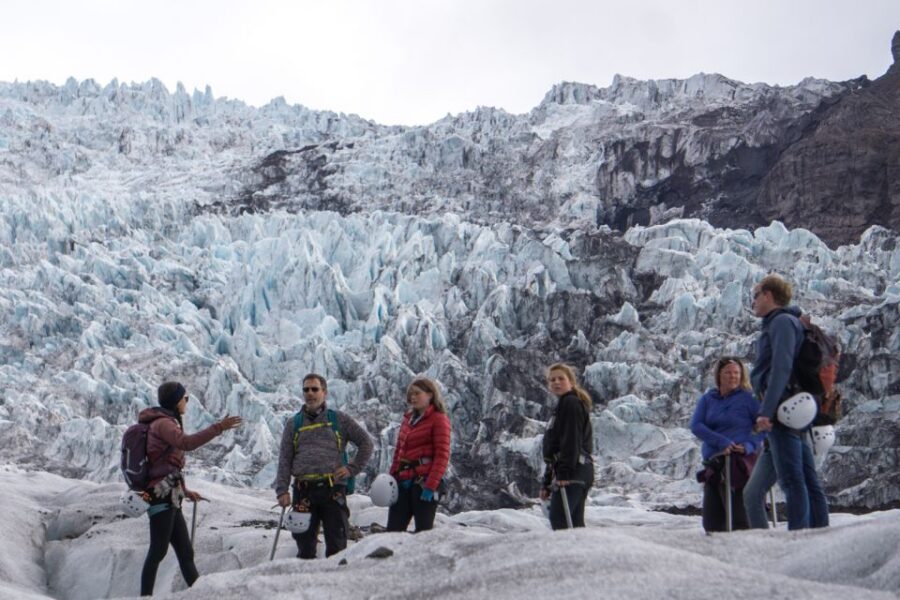
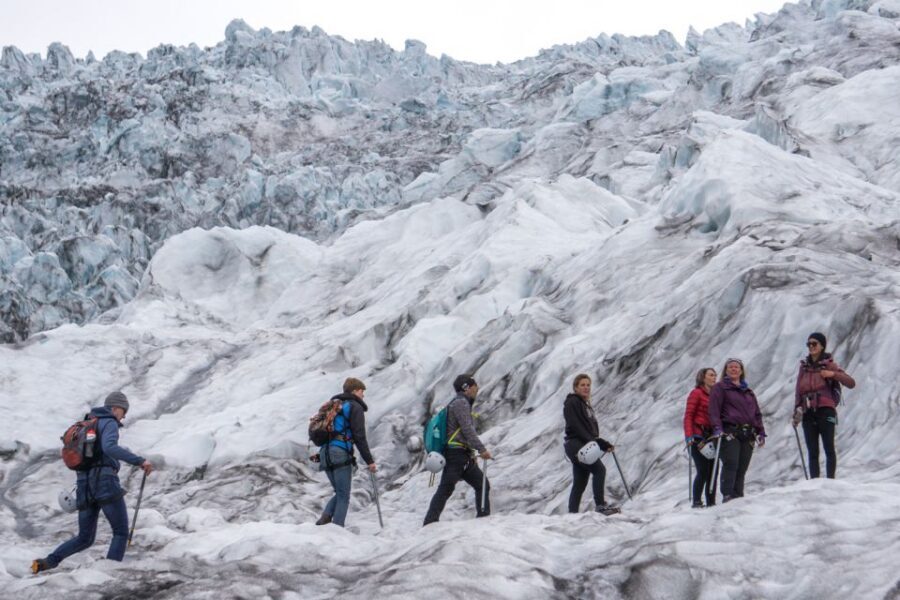
- Small-group access (max 8) keeps the pace human and the guide focused on your footing
- Going farther into Falljökull means more time at higher, more interesting ice zones
- Certified glacier guide + safety checks begin before you even step off safe ground
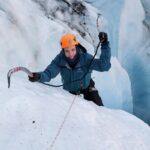
- All required glacier equipment included, with crampons explained and fitted on-site
- A short lunch break at the highest safely accessible point to reset before the return
- Modified Land Rover Defender transfer helps you reach the glacier without turning it into a long hike to get there
Falljökull adventure: the real reason this hike feels different
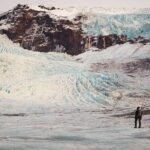
Skaftafell is famous for glaciers, but not all glacier walks are created equal. What I like about this tour is the way it’s built around time on the ice: you spend roughly 3.5 hours actually walking on Falljökull, then you return the same way you came—by 4×4—without wasting the day. That matters, because on a glacier, the best moments aren’t the first ten minutes. They’re when you’re deep enough to notice how the ice changes: cracks, tones, and the way melt and pressure shape everything.
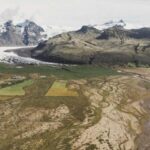
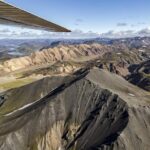
Falljökull is an outlet from Europe’s largest glacier, Vatnajökull. That’s more than trivia. Your guide uses that bigger picture to explain what you’re seeing—how forces over time deform and move the ice, and why the glacier can look sculpted but also dangerous. Multiple guides (names mentioned in past tours include José and Antoine) are praised for pairing the geology talk with practical walking guidance, so it feels like understanding and exploring at the same time, not a lecture on frozen ground.
You can also read our reviews of more tours and experiences in Skaftafell.
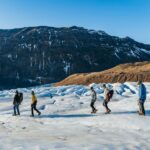
Meeting at Skaftafell Terminal and what the 15-minute drive really does

You’ll meet at the Skaftafell Terminal Tour Center right outside the National Park. Plan to arrive about 10 minutes early. This isn’t just “be there on time” busywork; it gives your group a buffer to get organized, meet the guide, and get ready for the gear fitting.
Then comes the first transfer: about 15 minutes by jeep / SUV toward the glacier area. The tour is careful here. You’re not trekking forever just to start. The modified Land Rover Defender matters too. This kind of rugged vehicle is designed for rough access roads and uneven ground near the glacier, which helps keep your energy where it counts—on ice.
If your Iceland day is packed (think waterfalls, beaches, lagoons), this is a nice slot because it’s compact: about 4.5 hours total, with the glacier walk as the headline.
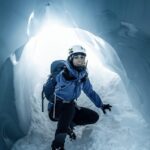
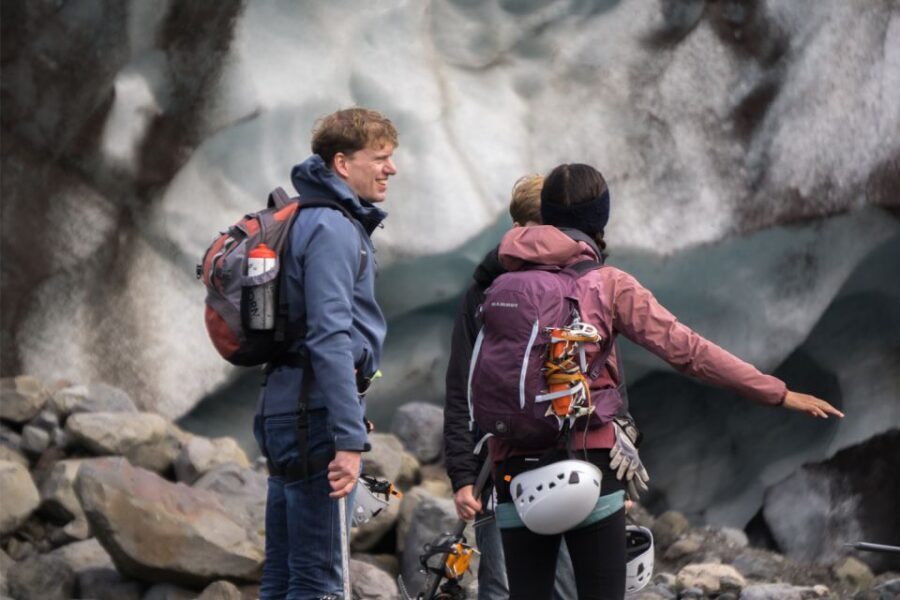
Gear and crampons: the part that can make or break your confidence
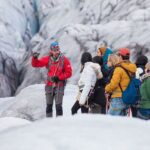
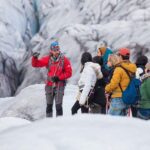
Before you head out, your guide brings you to the base area of the Falljökull outlet glacier and demonstrates how to put on crampons. That sounds basic, but it’s actually the foundation of the whole experience. A glacier hike is mostly about controlled steps. If you’re not comfortable with the spikes under your boots, you’ll spend the day thinking about your feet instead of the ice.
You’ll also get safety guidelines focused on what you’re doing during the walk and how to move with the group. The tour is described as moderate difficulty, but the safety approach is what helps people enjoy it without feeling rattled. Past feedback specifically highlights the guides’ focus on feeling secure and learning how to trust your footing, including reminders about wearing the right socks to avoid crampon blisters (people have reported that thick socks help).
One more practical point: you’ll have all required glacier equipment included. Hiking boots are not included, but you can rent them on-site. That’s useful if you’re traveling light and don’t want to bring heavy gear from Reykjavík.
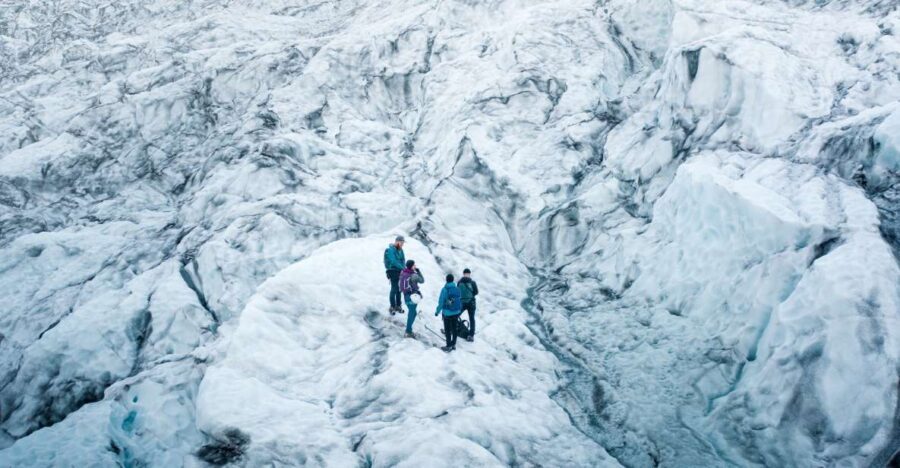
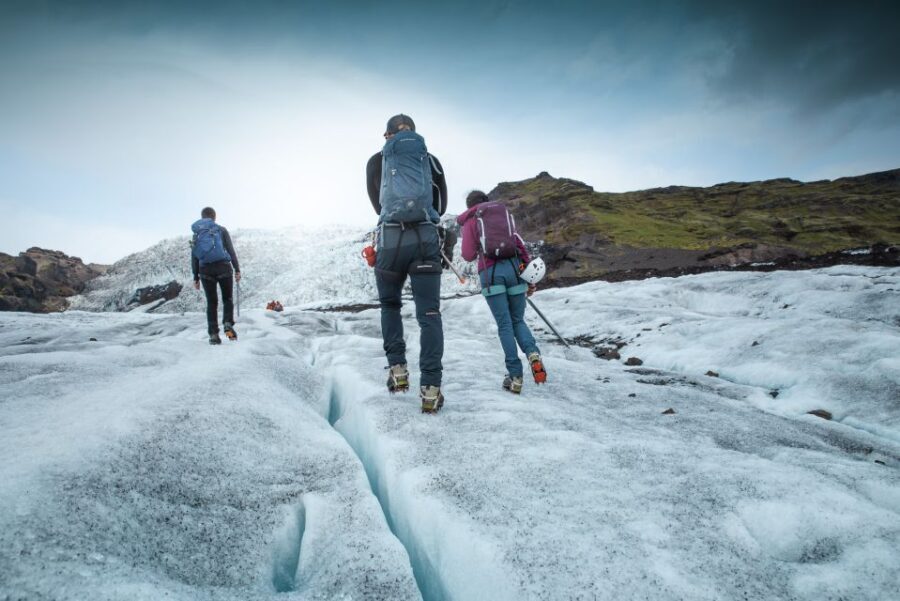
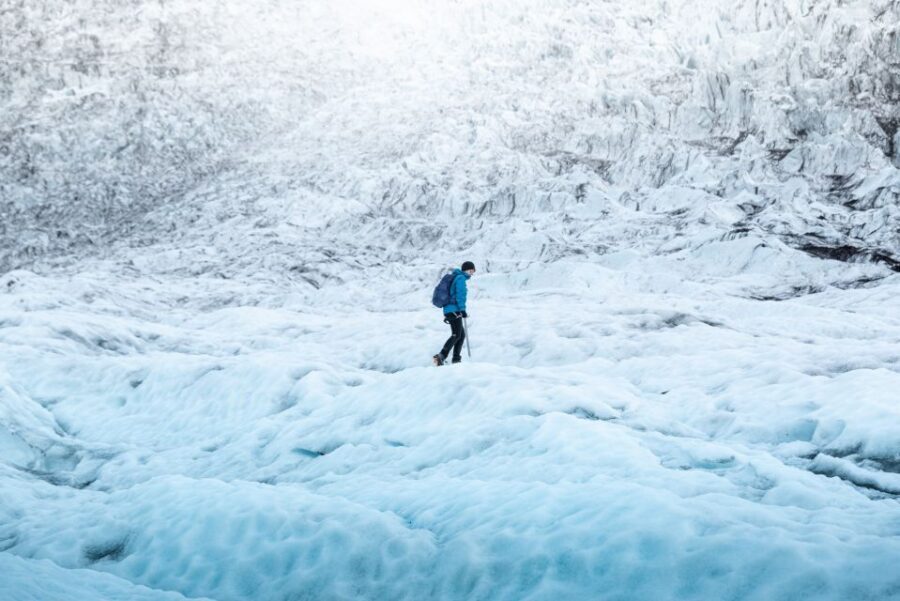
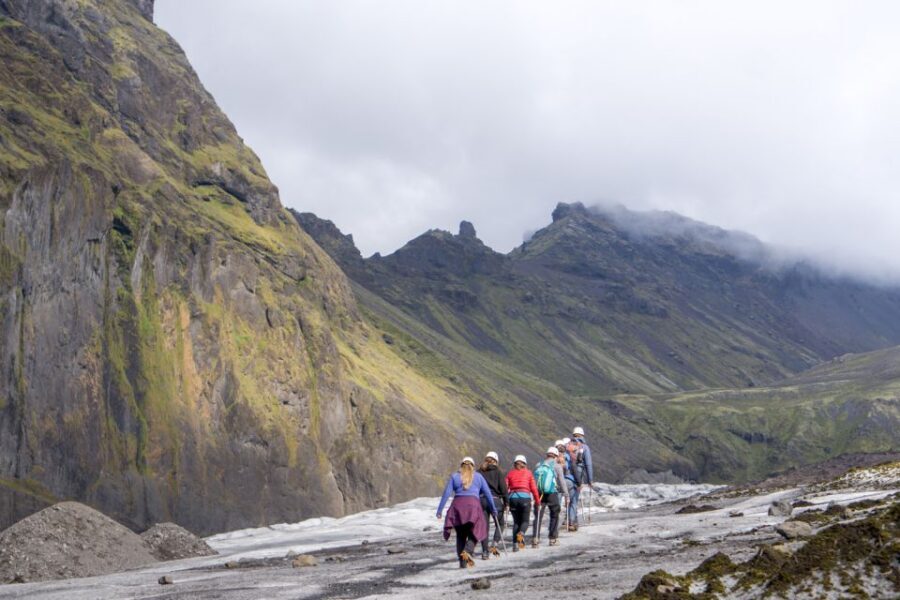
The glacier walk on Falljökull: how you get “farther” without going reckless
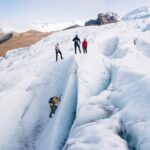
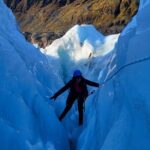
The core of this tour is a guided walk across Falljökull, for about 3.5 hours. The key promise isn’t just seeing ice—it’s going into the more adventurous, less crowded parts. In practice, that means you don’t just do a quick loop near the easy access points. Your guide adjusts the route based on glacier conditions and the group’s needs, aiming for parts of the ice that are interesting and safely reachable.
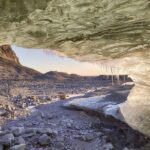
As you move inward, you’re likely to notice more than just “pretty ice.” The guide’s narration helps you read what you’re walking through: how meltwater and pressure create features, how cracks form, and why the glacier can look still even while it’s moving. Reviews mention guides pointing out things like fissures, waterfalls, and even a small ice cave on some trips when conditions allow. Treat that as a possible bonus, not a guarantee—but it’s a good sign that your guide is watching for moments worth stopping for.
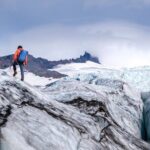
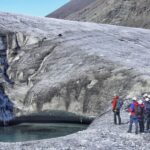
Also, the tour is structured for real pacing. Your guide brings you toward the highest point that is safely accessible, then you pause for a short lunch break before you head back down. That up-and-then-down pattern is how many glacier walks reduce fatigue while still giving you the “we really went up there” payoff.
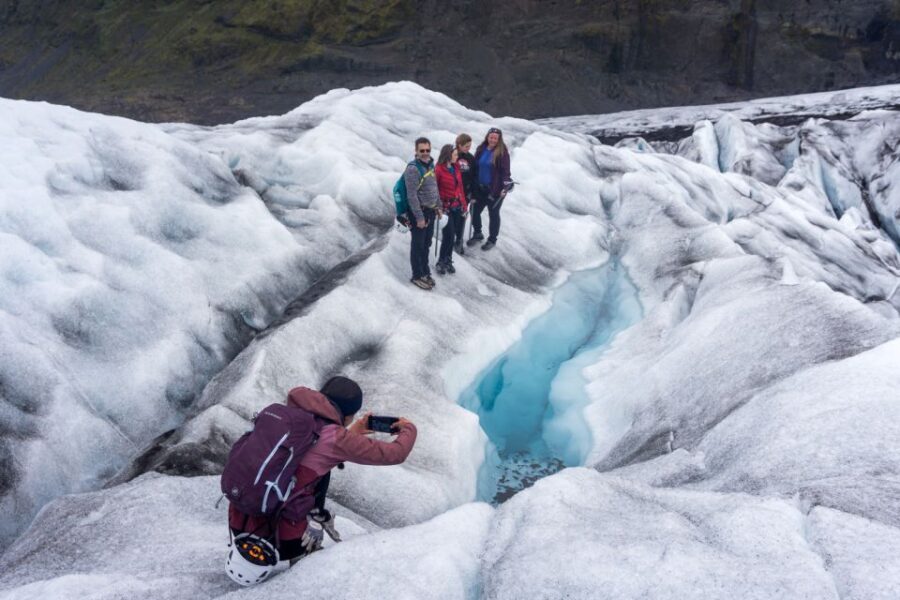
Lunch at the top: short break, big payoff
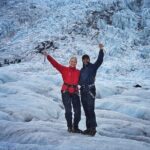
At the highest safely accessible point, you’ll take a short lunch break. This is one of those small details that changes the feel of the tour. You’re not just hiking hard and then rushing back. You stop, catch your breath, and get time to look—really look—at the ice features around you. It’s also when the group tends to settle into the moment. You can hear each other, swap quick impressions, and take photos without feeling like you’re racing the clock.
Because food and drinks aren’t included, you’ll want to bring something simple. The tour information explicitly asks you to bring food and drinks. In other words: plan to eat your lunch out on the glacier, not back in town.
Tip that comes up from real experience: pack something you can eat with gloves or crampon-ready hands. And if you’re sensitive to cold, keep your snack close to your body, not buried in a deep backpack pocket.
Photos and unforgettable ice moments (and how not to rush them)
On a glacier, the camera can trick you. Ice looks flat in photos. On the ground, you start to notice depth—how shadows sit inside cracks, how the glacier can appear blue in one angle and gray-white in another, and how textures change across short distances. What makes this tour special is that your time on ice isn’t cut short. You’re guided to higher ground and deeper areas, so the photos feel earned instead of rushed.
Reviews also mention guides who are good at creating moments: one guide (named José) was praised for showing fissures and waterfalls in the glacier and even a small ice cave. Others, including Antoine, got praise for mixing adventure with careful safety. And multiple accounts highlight that the small group size helps with this—your guide can slow down for a view or a photo without losing the whole schedule.
If you’re the type who likes to take your time, this format works. If you hate waiting, you still won’t feel dragged, because the guide is actively explaining what you’re seeing and why the route makes sense.
Fitness reality check: 6 km, uneven ground, and 250 m gain
This is a moderate hike, and the numbers are clear. You must be able to comfortably walk 6 km on uneven terrain with about 250 m elevation gain. On glacier ground, “uneven” isn’t a vague word. You’re stepping over ice and navigating the safest path the guide chooses based on conditions.
That’s the biggest consideration when deciding whether this tour is for you. If you’re generally comfortable hiking in cold weather and you don’t mind a steady climb, you’ll probably be fine. If you’re not, this is still a guided experience, but it’s not a casual stroll.
It’s also not suitable for children under 12 and not suitable for people with mobility impairments, based on the tour’s requirements. If those limits apply to you, save yourself the stress and pick an easier glacier option.
The $199 value: why the price makes sense for what’s included
At $199 per person for about 4.5 hours, the best way to judge value is to look at what you’re buying: a certified glacier guide, 4×4 transfer, and all required glacier equipment. You’re also buying time—3.5 hours on the ice is a substantial chunk compared to short, intro-only walks.
You’re not paying extra to figure things out on your own. The gear is handled, the crampon fitting happens with instruction, and the guide manages route and safety. When you add up guide time, equipment, and the specialized transfer, the price feels like a fair way to access a glacier without turning it into a logistical headache.
What you should still budget for:
- Hiking boots (rent on-site)
- Food and drinks (not included)
- Any extras like additional snacks, warm layers you choose to buy, or camera accessories
There’s also free cancellation up to 24 hours in advance for a full refund, plus a reserve-and-pay-later option. That’s helpful in Iceland, where weather can be a deciding factor.
What to bring for cold ice and long steps
The tour asks you to bring warm clothing, sunglasses, food and drinks, hiking shoes, and water. I’d add a few practical tweaks based on how glacier trips actually feel:
- Wear warm layers that let you breathe when you start climbing.
- Bring sunglasses even if it’s cloudy. Ice glare is real.
- If you rent boots, consider thick socks. People have reported crampon blisters when socks were too thin.
- Pack lunch in a way that’s easy to eat with gloves on.
Also: even if the guide handles the crampons, you still control your comfort. Shoes that fit well and socks that don’t slide can make a big difference over 3.5 hours.
Weather changes plans on glaciers, so trust the safety call
This tour can be cancelled in dangerous weather, with a full refund. That’s not a flaw; it’s glacier travel reality. On ice, conditions can change quickly, and guides are expected to keep the route safe.
What you can control is your mindset and timing. Keep some flexibility in your schedule around Skaftafell. If one day turns rough, another slot might work better. The good news is that this experience is designed for efficient use of your time, so when the weather lines up, you’ll still get the full glacier experience without it dragging on into an all-day ordeal.
Should you book the Skaftafell extra small group glacier adventure?
Book it if you want a glacier walk that feels like real exploring, not a quick photo stop. This is a strong choice for adults and older teens who are ready for a moderate 6 km hike on uneven ground, want small-group attention, and care about going higher on the ice with a guide who explains what you’re seeing as you walk.
Skip it if you need a very easy stroll, you have mobility limitations, or you’re traveling with a child under 12. Also, if you hate cold walking and the idea of crampon footing makes you nervous, you might want a gentler option.
If you’re choosing between a short glacier tour and a longer one at Skaftafell, this one’s length is part of the value. You’re paying for more time on the ice, which is exactly where the memorable moments happen.
FAQ
How long is the tour total?
The tour lasts about 4.5 hours, including transfers and roughly 3.5 hours on the glacier with your guide.
How big is the small group?
The group is limited to a maximum of 8 participants.
Where do I meet the tour?
Meet at the Skaftafell Terminal Tour Center (Skaftafell Airport), right outside the National Park. Arrive about 10 minutes early.
Is transportation included?
Yes. You’ll take a 4×4 drive transfer in a modified Land Rover Defender.
What glacier equipment is included?
The tour includes all required glacier equipment, and your guide will teach you how to put on crampons at the glacier edge.
Are hiking boots included?
No. Hiking boots are not included, but you can rent them on-site.
What fitness level do I need?
You must be able to comfortably walk 6 km on uneven terrain with an elevation gain of 250 m (moderate difficulty).
Is this tour suitable for kids?
No, it’s not suitable for children under 12.
What should I bring?
Bring warm clothing, sunglasses, hiking shoes, water, and food and drinks.
What if weather is dangerous?
The tour may be cancelled in dangerous weather, and you should receive a full refund.